
| Displacement | Standard | 41,673 tons (42,321 mt) |
|---|---|---|
| Design | 45,202 tons (45,928 mt) | |
| Full-load | 49,136 tons (49,924 mt) | |
| Battle-load | 50,129 tons (50,933 mt) | |
| Waterline length | 792.48 feet (241.5 m) | |
| Waterline beam | 118.11 feet (36 m) | |
| Draft | Standard | 28.54 feet (8.70 m) |
| Design | 30.51 feet (9.30 m) | |
| Full load | 32.78 feet (9.99 m) | |
| Battle load | 33.37 feet (10.17 m) | |
| Depth | 49.21 feet (15 m) | |
| Armament | 8-38cm/52 (15") (4x2) 12-15cm/55 (5.9") (6x2) 16-10.5cm/65 (4.1") (8x2) 16-37mm AA (8x2) 8-20mm AA (2x4) |
|
| Aircraft | Four Arado-196 floatplanes (plus two in reserve) |
|
| Speed | Normal maximum SHP | 29.0 knots |
| Overlord SHP | 30.12 knots | |
| Propulsive Power | Normal maximum SHP | 136,000 SHP (138,000 mhp) |
| Overlord SHP | 147,900 SHP (150,000 mhp) | |
| Endurance | 9,500 nautical miles @ 19 knots | |
| Fuel Oil Capacity | 8,267 tons (8,294 mt) | |
| Protection - Main Side Belt | 12.60" (320mm) | |
| Armor Deck | Over Magazines | 3.74" (95mm) |
| Over Machinery | 3.25" (80mm) | |
The German battleship Bismarck and her sister-ship Tirpitz were the largest warships of their type to be constructed in Europe. By all standards, theirs was a very conservative design based on the arrangement of the Baden and Bayern of World War I, with the exception that the modern ships were more heavily protected, with improved grades of armor steel and had more speed. The 380mm guns were of a new and more powerful model, designed for use in close range actions in the North Sea with French or British opponents. The Bismarck, the subject of this study, had the characteristics listed in Table I.
These ships featured a three-shaft propulsion plant which was subdivided into separate engine and fire room complexes by an arrangement of longitudinal and transverse bulkheads similar to that of the Baden and Bayern of World War I. This is why many consider the Bismarck and Tirpitz to be copies of these ships. The propulsion arrangement resulted in a large beam and a relatively substantial GM of 13.41 feet. This large metacentric height, as compared to that of contemporary battleships (Table 2), was a function of the ample stability and low silhouette desired by the Germans.
Fitting a centerline shaft and the requisite sized propellers for the metric horsepower of 150,000 required a much different stem form than was used in World War I German battleship designs. The stem at the centerline had to be configured to give sufficient tip clearance to the large centerline propeller so as to avoid troublesome vibration. This resulted in a loss of underwater lateral area at the stem and a shift of the lateral center of effort forward, which created problems with directional stability.
Locating the rudders midway between the centerline and wing propellers meant that the center to center distance of the rudders was considerably smaller than it would have been in a quadruple-propeller arrangement with the rudders positioned between the propellers on either side. It would appear that the triple-screw arrangement chosen by the German naval constructors resulted in an approximate one-third loss of turning power when compared to a quadruple-screw ship of the same power.
The need to provide clearance for the centerline propeller also resulted in a longer than usual overhang in which the weights of the rudders, steering gear and the protective armor for the steering gear was located. Buoyancy aft was limited by the smaller immersed volumes that resulted from the cutaway. These characteristics led to problems in German cruisers and battleships when they were torpedoed in the stem. Because of the lighter structure and smaller buoyancy than that found in a quadruple stem form these ships were more prone to damage from the whipping phenomena which occurs when the extremities of a ship are subjected to explosion-induced forces. The spectacular stem failures of the armored cruiser Lützow and heavy cruiser Prinz Eugen were examples of this.
| Ship Class | Displacement (tons) | GM (feet) | Beam (feet) | GM/Beam1 (feet) |
|---|---|---|---|---|
| Richelieu | 46,797 | 9.28 | 108.5 | 0.0865 |
| Iowa (1943) | 54,889 | 9.26 | 108.2 | 0.0865 |
| Yamato | 69,987 | 9.81 | 121.1 | 0.0810 |
| Vittorio Veneto | 45,029 | 5.27 | 106.4 | 0.0495 |
| Bismarck | 52,360 | 13.43 | 118.1 | 0.1135 |
| Anson (1945) | 45,360 | 7.20 | 103.1 | 0.0698 |
The Germans devoted great attention to the displacement and stability of the Bismarck and Tirpitz. They recognized the need to provide great initial stability, with commensurate resistance to large lists after side compartments were damaged. A disadvantage of this stability was the short rolling period resulting from the large GM. The Bismarck was a lively gun platform and the ship's general behavior at sea was probably rather unpleasant, particularly in following seas, where rolling and yawing motions are coupled. The Bismarck had excessive stability in many respects in that her GM exceeded the "good design practice" standard for GM (at last 5%, but no more than 10%) of the beam. Too much stability results in an unduly "stiff" ship with somewhat unpleasant rolling characteristics which tend to degrade weapon's systems effectiveness.
One of the designers of the Bismarck, Mr. Heinrich Schlüter, was quite unhappy with the protective scheme adopted for these ships. He felt that the lower portion of the side armor belt should have been terminated further below the design waterline than was done in the final design. He confided these concerns to his wife before he left on the fateful voyage that was to take his life. Such a change was impossible to make with the standard displacement already exceeding the limit by 7,600 tons and proposals being made to reduce the displacement.
The German Navy's emphasis on armor protection over gunpower and speed meant that German corporations were in a position to offer the German Navy newly developed armor steels. The Wotan Weich (Ww) and Wotan Harte (Wh) armor steels which were widely used on the armor decks and bulkheads of the Bismarck-class battleships had to be welded with special electrodes. The materials needed to manufacture these electrodes were scarce and even before the outbreak of war they had to be used with great economy. Eventually, a replacement electrode was developed that contained materials found in Germany. These material shortages shed new light upon the decision to suspend the construction of the "H" Class battleships at the onset of hostilities with France and the United Kingdom.
The need to save weight meant that it was not possible to distribute armor protection evenly along the hull; it was essential to develop an efficient arrangement which led to the following important decisions regarding the distribution of the heavy armor.
In order to retain offensive capability for as long as possible, the thickest armor was provided here, especially at the turret face plates, which were 360mm thick. The armor was 320mm thick on the turret rear, from 150mm to 220mm thick on the sides and 130mm-180mm thick on the top. The barbette armor was 340mm thick above the main deck and 220mm thick below.
It was intended that Bismarck be fought from the forward command position, particularly in engagements in the North Sea. Curiously, despite the heavy armor protection available inside the conning tower, battleship senior officers typically fought their ships from outside the armor in order to have better visibility. In other words, the senior officers of battleships in combat were often amongst the most exposed men on the ship. The conning tower roof plates were 220mm thick, the sides were 350m thick, and the deck was 60mm thick. The communications tube joining this key position with battle stations below the armored deck was shielded by cylindrical armor 220mm thick. In Bismarck's final battle, the ship was fought from the conning tower, since she was no longer maneuverable, but at the extremely close range the engagement was fought even this station proved to be no safe haven for its occupants.
From this space, it was possible to command the ship independently of the Forward Command Tower. Upon loss of the forward space, all ship command functions could be assumed within this compartment. That is why the senior surviving officer, Baron von Müllenheim-Rechberg, was cognizant of all problems in regard to the steering. This position was much more lightly protected than the forward conning tower, its roof was 50mm thick, its side walls were 150mm thick, the deck was 30mm thick and the access trunk was 50mm thick.
The armored citadel, which represented approximately the amidships half of the Bismarck, was given concentrated protection, with varying degrees of protection given the propulsion and ammunition spaces. The upper side belt was made up of 145mm thick (KC) welded armor. The main side belt armor was 270mm (KC) for a short distance near the upper belt, with 320mm (KC) thickness for most of the belt. Well below the waterline, the main side belt tapered to 170mm (KC). The ends of the citadel were shielded by welded (Ww) armor bulkheads with maximum thicknesses of 220mm. The belt armor was applied over a 50mm thick teak wood backing. A longitudinal torpedo bulkhead with a thickness of 45mm (Ww) provided some additional ballistic protection.
Increased gun ranges and the threat of aerial attack meant that the deck armor had to be effective against shells and bombs with very steep angles of fall. The horizontal armor on the Bismarck was, therefore, designed with particular attention to these considerations. The main deck was 50mm thick in way of the armored box. The armor deck was 80mm thick over the machinery spaces and 95mm thick over the magazines. Outboard, sloped 110mm armor plates supplemented the main side belt.
Overall, the Bismarck's armored citadel was given good protection against close range shellfire. Unfortunately, the ship was extremely vulnerable to long range plunging shellfire and major positions beyond the citadel were not as well protected as comparable positions on most foreign contemporary battleships.
The Germans were obliged by the terms of the 1935 Anglo-German Naval Treaty to observe the naval treaties signed in 1922 and 1930 as well as any which might be negotiated in the future. When the final design was found to substantially exceed the 35,000 ton standard displacement limit set by the 1936 London Treaty, several alternatives to reduce the displacement to meet Treaty requirements were evaluated. Sufficient reductions could only be accomplished by radical design alterations - modifying the twin main battery turret arrangement to feature either triple or quadruple turrets, altering the main battery to a smaller caliber, changing the split secondary battery to a dual-purpose type, or reducing the thickness and extent of the armor protection.
All of these changes were opposed by the German naval authorities and it was decided to proceed with a ship of 42,000 tons standard displacement and to attempt to deceive the British and Americans regarding their size.2 The draft of these "35,000 ton" ships was therefore officially reported to be only 25' 11" (7.9m). In any event, the Germans were convinced that the Japanese would reject the 1936 London Naval Treaty and thereby invoke an escalator clause, to take effect on 1 April 1937, permitting the construction of 45,000 ton ships.
American and British naval constructors were skeptical of the shallow draft and reported displacement of the Bismarck when she was launched in February 1939.
The fire-control equipment in British warships used direct current and was inferior to the fire-control equipment that was specified for the German ships. The Germans, like the Americans, had decided to use alternating current for their fire-control systems and this contributed to the efficiency of the German gunfire control systems in the engagement fought with the Hood. When the authors interviewed Admiral (then Lcdr.) J.M. Wellings (USN), who was aboard HMS Rodney during the 27 May 1941 action and had been on board Hood in late 1940, he commented that the firecontrol system of the Hood was no better than that he had used aboard USS Florida back in 1927.
When Bismarck was ready for sea in August 1940, she was recognized by the British as a dangerous and powerful antagonist. Although the Royal Navy was building five battleships of the King George V class armed with ten 14-inch/45 guns of a new and powerful model, these ships were acknowledged as being incapable of defeating either Bismarck or Tirpitz in single combat. Consequently, the Royal Navy planned to team their capital ships to fight these powerful new German battleships.


By early 1941, German submarines had seriously threatened British commerce, with 30-50 merchant ships being sunk each month. Months earlier, the battlecruisers Gneisenau and Scharnhorst had attacked British seaborne commerce, evading Royal Navy escorts with ease. The German naval high command now planned a powerful and daring April sortie of the Bismarck and the new heavy cruiser Prinz Eugen, which were just completing training in the Baltic, operating with the two veteran battle cruisers, then in Brest, France.
The ambitious plans for a three-month raid into the North Atlantic, commencing in April, were thwarted. Both battlecruisers had to be withdrawn. Gneisenau was damaged by torpedo and bomb attacks, while Scharnhorst needed to have her boilers retubed due to metallurgical problems encountered during her sortie into the Atlantic. When Prinz Eugen was damaged by a mine near Kiel, the operation had to be further delayed until mid-May. These delays to this bold operation in northern latitudes meant the German ships would be operating during much longer daylight periods.
Unknown to the German planners, a number of recent developments increased the risks confronting their surface forces. British search capabilities had been greatly improved by the receipt of Catalina patrol bombers from the United States, the new aircraft carrier Victorious had become operational, improved radar sets were being installed in British warships and aircraft and President Roosevelt had made an agreement with Prime Minister Churchill that the U.S. Navy would patrol the western Atlantic - in fact, he wanted American warships to sink any German surface raider caught in the Caribbean Sea. In addition, the American government had agreed to use its "Neutrality" Air Patrol to search for German surface raiders west of Greenland, which permitted the British to concentrate their war-worn and somewhat depleted search resources to the east. It is very interesting to note that the orders for "Operation Rhine" stated that active intervention by United States forces would prompt changes in the German operation.
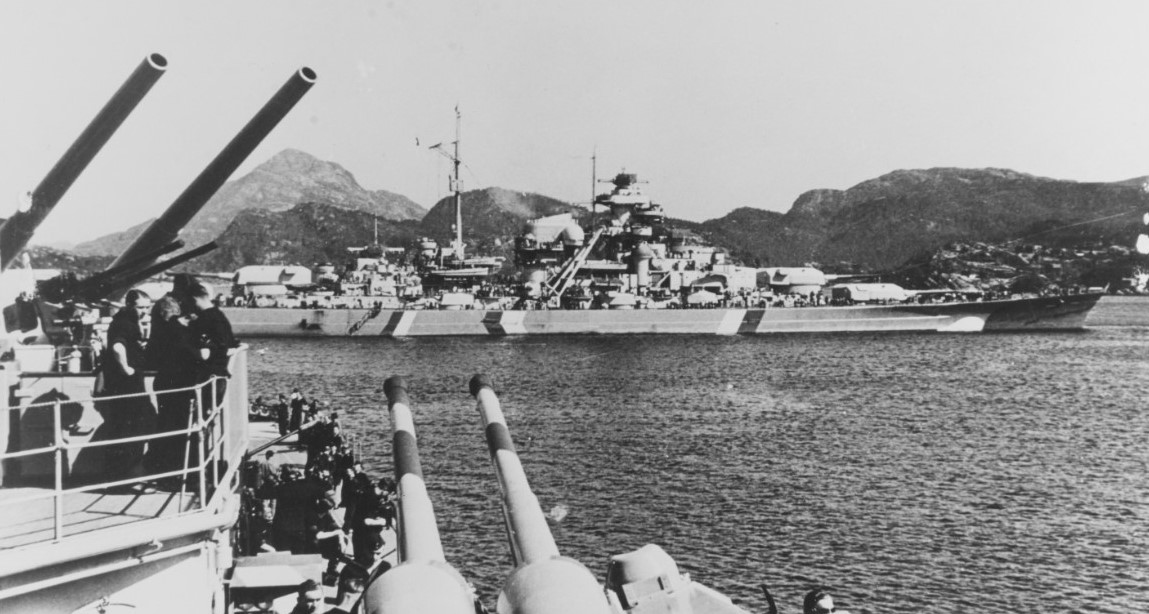
Bismarck and Prinz Eugen sortied separately from Gotenhafen (now Gydnia, Poland) on 18 May 1941. They were joined on 19 May by a minesweeping flotilla and three destroyers. After a passage through the Kattegat and Skaggerak, where they had a brief encounter with the Swedish cruiser Gotland, after a brief stop near Bergen, Norway, the battleship and the cruiser left their destroyer escorts behind and steamed into the Norwegian Sea, intent on breaking out into the North Atlantic.
The reasons behind Admiral Lütjens' decision to stopover in southern Norway have never been conclusively established. Based on our decades of research into the Bismarck episode, we now believe there were two compelling reasons which probably led to his decision not to proceed into the Norwegian Sea and rendezvous with the tanker Weissenberg and refuel, as had been planned:
First, the German mission had been compromised by the chance meeting with the Gotland on 20 May, dashing whatever chances the Germans may have had for an undetected passage to the North Sea. Admiral Lütjens was quite concerned about British reaction to his movements. The Admiral was also eager to avail himself of the latest air reconnaissance over Scapa Flow, the main Royal Navy base in the northern United Kingdom. A message from B-Dienst headquarters informed him that Royal Air Force squadrons had been alerted to the presence of a German battlegroup in southern Norway. In fact, one of the displaced squadrons from the carrier Victorious was moved to northern Scotland for possible action against the German ships.
Second, weather reports affecting the potential routes for his breakout attempt were delivered to Admiral Lütjens and his staff by a Luftwaffe meteorological officer who boarded the German battleship in Norway With the increasing duration of daylight in the northern latitudes in late May, it was crucial that the weather bc sufficiently overcast to hamper British aerial and surface reconnaissance. The Luftwaffe officer reported favorable conditions for a breakout into the Atlantic provided the German ships moved quickly. A large warm high pressure air mass had become stagnant off the coast of the eastern United States, a classic "Bermuda high" which sent temperatures in cities like New York, Washington and Boston soaring into the 90s. In contrast to this, a large polar air mass was situated over Greenland. These two air masses were in collision over abroad front in the North Atlantic, causing severe icing conditions and turbulence as high as 20,000 feet, with snow, rain showers and fog below the clouds. These were ideal weather conditions for the Germans.
Given the favorable weather conditions and the gathering British air forces in Scotland, Admiral Lütjens almost certainly decided it was urgent that he move promptly and decisively, ordering his forces to head directly for the Denmark Strait, the most distant passage from Scapa Flow. Baron von Müllenheim-Rechberg discussed the weather conditions with fleet meteorologist Heinz Exterbrinck on 22 May. Based or our knowledge of prevailing weather conditions at the time, it is plausible that Exterbrinck too urged Admiral Lütjens to head directly for the Denmark Strait in order to take advantage of conditions favoring an undetected breakout.
When Bismarck and Prinz Eugen arrived in Grimstad Fjord around 1200 on 21 May 1941, the heavy cruiser and the three destroyers were sent to Kalvanes Bay to refuel from the tanker Wallin. By 1930 on that day, after the cruiser and destroyers had taken on maximum fuel Bismarck and Prinz Eugen sortied on their Atlantic mission.
The battleship did not take on any fuel, an inexplicable oversight for an experienced commander such as Admiral Lütjens. Admittedly, the German operational orders, contemplating a rendezvous with the oilier Weissenberg in the Norwegian Sea, did not mandate such port fueling. It is possible that the Wallin lacked sufficient fuel for the battleship or that other circumstances intervened. Part of Bismarck's crew was engaged in painting out her camouflage, an effort that could have prevented the refueling operation. Whatever the reason, the failure to "top off" Bismarck's tanks was to prove to be a crucial omission.
The Royal Navy, although superior to the Germans in numbers, was forced to spread out its forces. Cruiser patrols kept watch over the likely breakout points around the Faeroes Islands and the Denmark Strait between Iceland and Greenland.
Heavy ships, including battleships King George V and Prince of Wales and the battlecruiser Hood, were at Scapa Flow. When Admiral Lütjens left Norway on Wednesday, 21 May, Admiral Tovey deployed his fleet to cover both exit routes, with Hood and Prince of Wales assigned to cover the Denmark Strait and King George V, the old battlecruiser Repulse and aircraft carrier Victorious sent to cover the Faeroes exit.
On 23 May crews of the British heavy cruisers Norfolk and Suffolk spotted the German ships attempting to break out into the North Atlantic via the Denmark Strait. Suffolk's radar-assisted contact reports helped Hood and Prince of Wales intercept the German force early on the morning of 24 May 1941. This sighting led to a massive redeployment of British warships in the Atlantic.
On the morning of 24 May 1941, Hood and Prince of Wales aggressively closed range in classic Royal Navy "Nelsonian" fashion. Hood, a World War One-era battlecruiser with the deficient protection characteristic of the type, was desperately vulnerable to long-range, plunging shell fire. Furthermore, Vice Admiral Lancelot Holland wanted to engage the German force before it could break away and sortie into the North Atlantic. In maneuvering to close the range quickly, Hood and Prince of Wales were forced to head almost directly towards Bismarck thereby simplifying the Germans' gunfire control problem.
In that era, long-range accuracy in deflection was much more readily obtained than accuracy in range. Hood and Prince of Wales presented their full lengths as targets for the German gunners, increasing the likelihood of hits due to salvo dispersion in range. In addition, such a heading masked the after main battery turrets of the British ships, lessening the volume of fire that could be directed at the Germans.
A few minutes after battle was joined, Hood was damaged by 203mm shellfire from Prinz Eugen. Upon reaching a range of 16,500 yards from the German battleship, Admiral Holland ordered a turn to port. This turn was never fully executed by the Hood. Unfortunately for Hood and her crew, Bismarck's third salvo1a was already in the air and the Germans had a perfect gunfire control solution.3 One or more shells from this salvo struck the old battlecruiser in the vicinity of her mainmast. One 380mm shell from this salvo probably struck Hood in her after engine room sending red-hot splinters into the adjacent 4-inch powder magazine. Another shell in the same salvo may have detonated one of the torpedoes in the four fixed tubes which were located on the Upper Deck (USN Main Deck) of Hood. In any case, the 4-inch magazine ignited and almost immediately thereafter, the cordite in "X" 15-inch gun turret ignited causing a deflagration in Turret "Y".4 The armor deck briefly confined the effects of the powder magazine disaster, but the flames finally passed up through the after engine room vents, located near the mainmast.
A fire was already raging in that area, caused by an early 8-inch shell hit from Prinz Eugen which had set ready service lockers for the unrotated projector ("U.P.") antiaircraft rocket launchers ablaze. The spectacular firestorm ripped the old battlecruiser in two, with the two sections sinking within three minutes. Light debris (rivets) from Hood's shell plating rained down on Prince of Wales, almost half a mile away. Heavier structures, such as "X" turret, were blown overboard. Pipes from within the side protective system floated to the surface. It was an alarming and depressing scene to those on the other British ships in pursuit.
The destruction of Hood's main subdivision bulkheads between the three magazines and the after engine room at a point where there was a reduction in the depth of the hull girder resulted in an instant, calamitous reduction in the structural strength of the hull. Hood was reportedly heeling some 6-7 degrees to starboard, and then quickly began capsizing to port as her hull was torn apart. It is likely that secondary explosions occurred as the ship sank, such as when the hot boilers contacted the 48-degree seawater. Such collateral damage would greatly complicate any future analysis of the Hood wreck by a Ballard-like expedition. Available evidence leads us to believe that the battlecruiser broke apart near the "step-down" in her hull, just forward of "X" turret.
This tragedy was witnessed by very few of those on board Prince of Wales. The deflagration of the 112 tons or so of cordite in the after magazines was noted as a "quiet, crackling noise," as in a rapid powder burn, quite unlike the loud "crack" or "clap of thunder" associated with an explosion.5 Understandably, many of the men who viewed the Hood's destruction from Prince of Wales were distracted by the calamity. The crew of the forward secondary battery gunfire control director, for example, was very slow in engaging Prinz Eugen with 5.25-inch fire until their ship was struck by a shell from Bismarck.
Prince of Wales subsequently became the sole target of accurate and concentrated fire from the two German ships. Prince of Wales had concentrated her fire on Bismarck throughout the engagement, with Hood targeting Prinz Eugen. Once the British had closed range to about 26,000 yards, the Type 284 gunnery radar aboard Prince of Wales was used to check the accuracy of the ranges being obtained using the main battery coincidence-type optical rangefinders.2a This permitted Prince of Wales to hit Bismarck with her sixth salvo, before she received seven hits and suffered multiple mechanical failures of her 14-inch guns which forced her to turn away from the Germans.6 The British battleship had fired a total of seventeen salvos, all involving five guns or less. One gun in Prince of Wales' "A" turret had problems with its rammer and could no longer fire after the first salvo. Her "Y" turret jammed and was out of action for approximately one hour. As Prince of Wales turned away, she was struck underwater by a diving 380mm shell which fortunately did not explode. We are convinced that it was Prince of Wales, not Hood, which damaged Bismarck. Hood fired at Prinz Eugen throughout the engagement. Although Hood did signal for Prince of Wales to shift targets, her own fire control equipment was too antiquated to permit her to change targets herself.
The destruction of Hood was a stunning German victory, but not without its price. The German battleship had been hit by three 14-inch shells from Prince of Wales. One 14-inch shell hit aft of the stack and demolished the stern of the captain's motor launch. Another 14-inch shell fell short, causing serious damage after following an underwater trajectory and hitting Bismarck below the waterline. The third shell penetrated the 60-mm splinter belt in the bow, above the normal waterline but within the bow wave generated by high speed steaming.
The first shell caused negligible structural damage. The second shell struck the port side of Bismarck somewhere below the 320-mm main side belt in compartment XIV (in way of the fore bridge tower). This shell defeated the side protective system and exploded against the 45mm torpedo bulkhead. Fragments from the explosion penetrated the bounding bulkhead of the portside cable ways and the main transverse bulkhead between the forward port turbo-generator compartment and the port boiler room. The turbo-generator room quickly filled with water. The boiler room flooded at a much slower rate through tears in welded seams in the main subdivision bulkhead. These leaks were controlled by plugging the torn welds with canvas hammocks.7 The eventual loss of power from two boilers in the port boiler room reduced the battleship's maximum speed to 28 knots, still marginally better than that of the pursuing British ships.
The third 14-inch shell, which passed through the 60mm splinter belt well forward on the port bow and above the armor deck, dramatically changed the course of the Bismarck's mission. Compartments XX and XXI in the bow were totally flooded with a mixture of oil and seawater. As the manifolds for the fuel distribution system were located in one of the flooded compartments, Bismarck was suddenly deprived of the use of more than 1,000 tons of fuel oil. The shell passed completely through Bismarck without exploding, but the holes it left were some 850mm in diameter and below the bow wave with the ship trimmed down by the bow. After voids were counterflooded aft, these holes were covered with sail cloth. We could not detect either of these shell holes in the photography brought back by Dr. Ballard in 1989 because Bismarck is imbedded in sediments up to her design waterline.
Bismarck took a 9-degree port list and a trim down by the bow of 2 meters. The loss of more than 1,000 tons of fuel was by far the most critical consequence of this battle damage. Fuel tanks had been contaminated by sea water, and the fuel distribution system forward had been seriously damaged. The access trunks to the manifolds in this area were also flooded.
Although the Germans were able to localize the damage caused by the two underwater shell hits, flooding in the affected compartments was permanent and had to be countered by flooding port voids aft in the area of the steering gear rooms to reduce trim and list.
At dusk, a torpedo attack was made by Swordfish biplane torpedo bombers from Victorious, which had drawn to within 200 miles of Bismarck's position during the early evening of 24 May. The torpedo planes made their attacks, but were only able to make one hit. The torpedo struck the 320-mm main armor belt on the starboard side between the forward command tower and the funnel. The shock effect of this explosion was substantial, throwing one crew member against the superstructure, killing him, and severely injuring six men in the forward starboard turbo-generator room (Compartment XIV) inboard of the point of torpedo detonation.8
The torpedo detonation also displaced emergency damage control shoring and hammock patches in the welds, and weakened already damaged structure on the port side. This resulted in the complete flooding of a forward boiler room on the port side. The considerable shock effect from the firing of the 37mm and 105mm guns contributed to loosening the shoring. The loss of the boiler room had been anticipated, as progressive flooding had never been completely arrested, and two boilers had already been secured, reducing Bismarck's speed. In addition, the zig-zagging and violent turns made to avoid torpedoes tore away the sail cloth over the two shell holes in the bow. This caused continued flooding at an increased rate due to ship speed and the deeper caused by counterflooding.
Bismarck continued on a course south to southwest until 0300 on 25 May, when she made a long gradual turn to starboard and maneuvered some distance behind her zig-zagging British pursuers on a course towards Cape Finnestere, France. The Germans were unaware they had managed to break contact.
The Germans had been both impressed and depressed by the unexpected efficiency of the British radar. The Germans continued to receive British radar transmissions, although the receivers on the Royal Navy ships were too far away to receive the returning echoes from the Bismarck. As a result, not suspecting he had broken away from his pursuers, the Admiral sent a very long (over 30 minutes) situation report radio message describing the actions of 24 May and the resulting damage.
The German radio transmission was intercepted by British radio-direction finding stations. Admiral John Tovey requested that the resulting lines of bearing be sent to King George V, where they were mistakenly plotted on a Mercator chart, rather than the gnomonic chart which was required to plot such lines of bearing correctly. Consequently, for seven hours thereafter the British ships under Tovey's command steamed away from Bismarck instead of toward her! After the computations were re-examined late in the afternoon, Admiral Tovey realized that a mistake had been made, and, after consultation with the Admiralty, finally let himself be persuaded to follow a course to the east. After seven hours of heading in the wrong direction, the British fleet turned to the southeast, the direction in which Bismarck had always been heading. Rodney, an older and much slower ship, had maintained a steady course to the east and was now only slightly astern of Bismarck, although gradually losing distance.
The stormy, overcast weather helped in this turn of events. Winds of force 9 and dense cloud cover aided the Germans in their escape, but their course was downwind and following seas caused a large yaw response and significant rolling. During trials in the Baltic, Bismarck had demonstrated problems with directional instability, which was corrected by using the rudders. The combing effects of the storm, the following seas and this slight directional instability, necessitated substantial rudder usage to maintain the desired course.
Lütjens decided to limit Bismarck's speed to 20 knots to conserve fuel. Contrary to what has been established about the fuel situation on Bismarck, she was never in danger of actually running out of fuel. The Germans, however, were concerned about the effects of excessive fuel consumption that might result if she were forced into an engagement with a British battlegroup before she could gain the protective cover of Luftwaffe aircraft based in occupied France.
The near-calamitous erroneous plotting of Bismarck's position had ensured her escape unless the British could somehow slow Bismarck to permit the pursuing, slower Royal Navy ships to overtake her. The British had one chance for this . . .
On the morning of 26 May 1943 [sic, it was actually 1941 - TD], Force "H" from Gibraltar was slightly north of Bismarck's position. Battlecruiser Renown, aircraft carrier Ark Royal and light cruiser Sheffield had crossed Bismarck's track a few hours ahead of Bismarck and were very close to her when a Catalina flying boat spotted her at 1030 on 26 May.9 Light cruiser Sheffield was detached from Force "H" to track Bismarck because she was equipped with an older model Type-79 air-warning radar and, more importantly, because her skipper, Captain C. Larcom, was a former aviator. Unfortunately, this cruiser's presence in the area of the Bismarck was not made known to the British aviators aboard Ark Royal and the first attack by Ark Royal aircraft was made on Sheffield instead of Bismarck. Fortunately, no hits were made, but it was subsequently decided to re-fit the torpedoes with contact pistols instead of the magnetic ones which had exploded harmlessly in the waters around the Sheffield. The second torpedo attack, this time on Bismarck herself, was made at sunset in unbearable weather conditions, Force 9, with heavy cloud cover and waves 25-40 feet high.
Fifteen Swordfish planes took part and two torpedo hits were made. One struck abreast of the aft superstructure adjacent to Compartments VII and VIII. Slow flooding followed, caused by tears in welded joints and longitudinals and structural failures in transverse bulkheads. This damage was inconsequential compared to the effects of the second torpedo, which effectively doomed the ship.
The fatal torpedo hit the steering area of Bismarck. The full fury of the detonation was vented into the ship and against the shell and rudders. The steering capability of the ship was destroyed. The transient whipping response caused by this torpedo hit was stunning. The hull, according to survivors, acted like a springboard, and severe structural damage was sustained in the stern structure. The steering gear complex, encased in 150mm thick armor, was rather rigid in comparison to the 10 meter long canoe-shaped stern. The unarmored stern structure vibrated at a different frequency than the main hull just ahead of it. Tears were opened in the side shell and bulkheads adjacent to the damaged area. The two decks in the stern were wrecked by the force of the explosion, and equipment in the fantail area was seriously damaged as the gasjet expanded upward. Seaman Helmut Behnke, who was sent to check on the fog-making machinery and its piping found it completely destroyed. Evidence of the severity of damage can be seen in the videotapes of the stern area of the wreck. The remaining platform decks are badly twisted and the upper portions of the damage can be barely seen just above the sediments.

The rudders were jammed at a position of 12 degrees to port, as the ship was in the process of turning to evade a portside torpedo attack when she was struck. Herculean efforts by the damage control teams could not correct this situation as they were unable to enter the steering compartments. Immediately after the torpedo hit Bismarck commenced turning in circles, out of control. Once speed was reduced, the ship inexorably assumed a course to the northwest, directly towards her pursuers, as the intensity of the storm increased.
Attempts to vary the propeller rpms on the three shafts, ordered by the leader of the damage control team, Commander Hans Oels, failed to counter the effects of the jammed rudder. With British destroyers now closing to attempt torpedo attacks, Bismarck began a night gunfire action which prevented any further damage-control efforts aft. Stormy conditions, darkness, and gun blast from turrets Caesar and Dora prevented damage control teams from assembling at the stern to try to access the steering gear compartments and repair the damage. Divers reported to Commander Oels, the Executive Officer, that they were unable to enter because of surging water within the after steering gear rooms. One of the divers had to abandon his attempt after his air hose became ensnared in damaged structure, cutting off his air supply. Josef Statz overheard Commander Oels say to the exhausted divers when they entered Damage Control Center: "Only if we had the diving apparatus issued to submariners."
We believe that part of the stern collapsed onto the rudders, as happened with the Prinz Eugen and armored cruiser Lützow, or was damaged in such a way that it was impossible to steer the ship by either manual or mechanical means. It would have been necessary to cut away structure which was covered by surging water. In any event, the repair of such damage was beyond the capability and material provided aboard the Bismarck, even if weather and battle conditions had been more favorable. The stern structure was massively damaged and eventually failed.
There is remarkable similarity between the Bismarck damage and a similar torpedo hit on the stern of Prinz Eugen on 23 February 1942. Dr. Erwin Strohbusch, who directed the repairs of this heavy cruiser in Norway, wrote to us that this incident, and an earlier one on the armored cruiser Lützow, whose stern also collapsed from a torpedo hit, indicated a structural flaw in the stern design of German armored ships, heavy cruisers, battleships, and battlecruisers. Improvements were made to the stern structures of Admiral Hipper, Lützow, Tirpitz, Admiral Scheer and Scharnhorst during 1942-1943.
Alone and without air support, Bismarck found herself surrounded by opposing forces during the night of 26-27 May 1941. Although none of the 16 torpedoes fired by British destroyers hit Bismarck, their active presence did cause her to fire her 380mm and 150mm guns and wore down the stamina and morale of her crew. Other than minor splinter damage, these British destroyers escaped their encounters with Bismarck unscathed.
According to the recollections of Baron von Müllenheim-Rechberg and Mr. Statz, these destroyers achieved no torpedo hits. We did find evidence, however, of a fire on the starboard bow of Bismarck, presumably caused by a star shell falling on the deck and burning out. Mr. Statz has confirmed that his CPO, Gerhard Sagner and a detachment of sailors was ordered to extinguish this fire, but that they were unable to access it due to heavy seas washing over the bow and gun blast from the guns of turrets Anton and Bruno. Eventually, heavy seas washing over the bow put out the fire. This star-shell fire was reported as a definite torpedo hit by the British destroyer Maori.
On the morning of 27 May 1941 Bismarck was surrounded by British forces consisting of battleships King George V (ten 14-inch guns) and Rodney (nine 16-inch guns), battlecruiser Renown (six 15-inch guns), aircraft carrier Ark Royal, heavy cruisers Norfolk and Dorsetshire (each with eight 8-inch guns), cruiser Sheffield and nine destroyers.
Admiral Tovey's strategy was to quickly close Bismarck from her port bow with King George V and Rodney. Renown, with her light protection, was ordered to accompany Ark Royal and remain well clear of the scene of the gunnery engagement. Renown was to be used only if the primary force sustained incapacitating damage. The battle began at 0847, commencing at a range of 20,000 meters, with the British ships firing first. Below is a British track chart of the action.

Bismarck, unable to steer, was at the mercy of the gale-force storm. To fire guns from a platform that had unpredictable ship motions created a difficult gunnery problem, but Adalbert Schneider, Bismarck's gunnery officer, was able to obtain a straddle on Rodney before his ship began taking hits from British shells. Rodney's gunnery was very accurate in these opening moments, before she began to have difficulty in ranging. King George V, with her more modern equipment and radar, also found her target early and between 0920-0924 hit Bismarck with a number of her 14-inch shells. Cruiser Norfolk concurrently fired at Bismarck from starboard and shortly after 0900 cruiser Dorsetshire approached Bismarck from the starboard stern quarter. The volume of fire directed at Bismarck was remarkable, as Table 3 shows:
| Ship | 16" | 14" | 8" | 6" | 5.25" |
|---|---|---|---|---|---|
| King George V | -- | 339 | -- | -- | 660 |
| Rodney | 380 | -- | -- | 716 | -- |
| Dorsetshire | -- | -- | 254 | -- | -- |
| Norfolk | -- | -- | 527 | -- | -- |
A total of 2,876 shells were fired at Bismarck from 0847-1019, most at relatively close ranges (see Table 4). During that time, it is possible that as many as 300-400 shells hit the German ship. Why did she not blow up and sink?
| Time | Rodney | King George V | Remarks |
|---|---|---|---|
| 0847 | 23,000 | -- | Rodney commences to fire. |
| 0848 | -- | 22,500 | King George V opens fire. |
| 0913 | -- | 11,500 | Rodney and King George V close at 16 knots. The Rodney does not fire until 0918 due to a change in course. |
| 0918 | 9,100 | -- | Rodney resumes fire. |
| 0920 | -- | -- | "A" turret of King George V out of action because of jammed training gear. |
| 0930 | 5,500 | -- | Rodney closes on Bismarck's port side. |
| 0950 | -- | -- | Seaman Josef Statz appears on the bridge of the Bismarck. |
| 0954 | -- | 7,300 | King George V resumes fire from all her turrets. |
| 1003 | 3,700 | -- | Rodney approaches on the Bismarck's starboard quarter. |
| 1008 | -- | -- | Rodney continues salvo fire, scoring repeated hits. |
| 1014 | 3,700 | -- | Rodney ceases fire. |
| 1021 | -- | 3,700 | King George V ceases fire. |
As previously discussed, Bismarck had excellent stability characteristics, with a substantial metacentric height (GM), large righting arms (GZ) and a great range of positive stability (see Table 5). Such stability was necessary to offset the effects of the flooding of large off-center compartments. As a result, it was necessary to cause massive off-center flooding to capsize and sink a Bismarck-class battleship. As will be seen, the extensive damage sustained by Bismarck was sufficient to overwhelm and defeat the ship, but was not of a nature to cause her to sink quickly.
| Condition | Displacement (Metric Tons) |
GM (Meters) |
Range of Stability (Degrees) |
GZ (Righting Arm) (Meters) |
|---|---|---|---|---|
| Light Ship | 41,250 | 3.60 | 65 | 2.00 |
| Standard | 43,200 | 3.55 | 59 | 2.25 |
| Full Load | 47,700 | 4.00 | 55 | 2.45 |
| Capacity | 53,200 | 4.40 | 53 | 2.70 |
Most of the gunfire damage was concentrated on the forward superstructure and command tower. Many shells ricocheted after hitting the water surface or simply exploded in the sea. The armor citadel, designed for close-range gunnery actions in the North Sea, prevailed.
Despite the close range at which most of this action was fought we have found that the 50mm main deck armor of Bismarck was penetrated by two of the 16-inch shells from Rodney. The pitching and rolling of the German battleship may have somewhat decreased the obliquity permitting penetration. Once penetration occurred, the 50mm armor deflected the shells downward, enhancing their ability to penetrate the main armor deck directly below due to their more nearly normal angles of impact. Ironically, reducing the main deck plating thickness might have actually enhanced the protection of Bismarck as heavy shells would not have been deflected downwards, with improved chances for penetration.
There are reports of heavy shells exploding in the port turbine room and in one of the starboard boiler rooms between 0920-0930, when Rodney was at ranges of less than 9,000 meters. Mr. Statz has confirmed these two shell hits and stated that one was near his position in Damage Control Center, thereby preventing his escape aft with the party of Commander Oels. This shell exploded in the starboard boiler room, started a fuel oil fire and burst steam pipes. Superheated steam scalded a number of ratings who had survived the shell burst.
These two hits and those which silenced the forward turrets and the main battery director led the Executive Officer, CDR Hans Oels, to order the scuttling of the ship (Measure V, where V = "Versenken" = Scuttling) between 0920-0930.
One American battle damage experience in World War II, very similar to the Bismarck situation, aided our analysis. The American battleship USS South Dakota, with a profile generally similar to that of Bismarck, was engaged by Japanese forces off Guadalcanal during a night action on 13-14 November 1942. At a range of 5,800 yards, South Dakota was silhouetted by Japanese searchlights and fired on by Japanese heavy cruisers Atago and Takao (each with ten 8-inch guns), battleship Kirishima (eight 14-inch guns) and several destroyers. The Japanese gunners' probable aiming point was the forward superstructure and some 27 shells hit the ship. Due to the close range of the engagement, most of the shells hit the superstructure, with very few striking below the main deck. Based upon this damage, which is documented in a battle damage report which we have thoroughly studied, the action resulted in a Gaussian distribution of shell hits on South Dakota with a peak located at her forward superstructure. The distribution of shell hits observed on Bismarck is surprisingly similar.
Most of the British shells struck the forward superstructure of Bismarck with the hits late in the action simply rearranging the debris created by earlier shell hits. A few shells struck and penetrated the 350mm conning tower, the upper splinter belt and the lower side belt. However, based upon the distribution of hits during the South Dakota action, which also took place at a close range, we believe that there must have been numerous serious shell hits in the area between the Admiral's bridge and the stack. We know from photographic evidence that there was an internal explosion in the forward port 150-mm turret and its magazine, probably caused by either 16-inch or 14-inch shells. Again, the historical record and probability theory can be used to determine the origin of these shells. One important point that we have discovered in examining the video of the port and starboard sides of the forward conning tower is that the penetrating damage from 356mm and 406mm shell hits was all on the port side.
Investigation of the gunnery records of King George V and interviews with several of her officers reveal that there were problems with the mechanical safety interlocks designed to prevent explosions within the turrets from being transmitted to the powder magazines below. Her gunnery during the battle averaged 60% between 0920-0950, with only the twin turret performing at 100% effectiveness. Rodney, however, kept up a steady barrage, with few misfires. With the failure of Rodney's fire-control equipment around 0930, Bismarck was tracked and ranges estimated visually. Despite this, we believe Rodney did most of the serious damage to Bismarck. Her 2,048-pound shells were extremely effective at ranges of 2,500-8,000 meters and could easily penetrate any vertical armor surface of Bismarck. Near the end of the battle, when Bismarck was completely defenseless, King George V closed to 3,000 meters, at which range her 14-inch armor piercing shells could penetrate all of Bismarck's vertical armor.10
All the guns aboard Bismarck used cartridge-type powder cases. The Germans believed cartridge-type ammunition was much safer than bag ammunition and decidedly less susceptible to magazine explosions such as those which devastated several British battle cruisers at Jutland. There were, however, magazine fires in Gneisenau in February 1942 and Bismarck's sister ship Tirpitz on 12 November 1944 which were caused by red-hot splinters from bomb hits which ignited some cartridges. In Gneisenau, turret Anton was uplifted a few feet before magazine flooding put out the deflagration.11 In Tirpitz, turret Caesar was actually blown overboard.3a
In the case of Bismarck, we believe that the magazines of turrets Anton, Bruno and Dora were flooded and no magazine deflagrations occurred. Turret Bruno was displaced upward slightly by an internal explosion which did not reach the magazines but was sufficient to blow off the rear armor plate. Thereafter, the turret was pitched forward in its barbette. This all has been confirmed from survivor testimony of Mr. Statz.
Most of the damage done by Dorsetshire and Norfolk was relatively superficial. A hit from Norfolk sheared away the forward radar and gun director atop the forward command tower and other shells damaged a number of 37mm and 105mm gun mounts along the starboard side. According to our interviews of Baron von Müllenheim-Rechburg and Mr. Josef Statz, the gunfire of Dorsetshire was devastatingly accurate, smashing gun mounts, gouging into armor, ripping away light plating and sweeping away debris left by hits from the battleships. In many cases, damage came from multiple hits causing debris to be swept overboard or piled in large heaps along the port side from the amidships catapult to turret Bruno. Baron von Müllenheim-Rechberg and Mr. Statz have told us that the two after main battery turrets sustained gouges several centimeters deep in their armor surfaces. The evidence regarding the final condition of these turrets is limited because they were buried in the seabed after the ship capsized on sinking.
Our examination of the wreck of Bismarck does not permit us to conclusively determine exactly when the battered stern end fell away - it had almost certainly failed structurally during the capsizing process. Prior to the capsizing, the stern no longer contributed any buoyancy to the stability and survivability of the battleship. We do know from the testimony of Mr. Statz that Bismarck's stern was in place when he was carried past it by the prevailing seas around 1035. Mr. Statz was within 50 meters of the ship when she capsized and sank. There is the possibility that as the ship sank and righted herself, the hydrodynamic forces caused the stern to fail completely underwater.
We attribute the structural fatigue-type failures in the stern to poor welding, a structural continuity problem resulting from the design mistake of not extending the longitudinal bulkheads bounding the Steering Gear Room aft into the stern-end structure and gunfire damage to the plating just aft of the transverse armored bulkhead to the steering compartments. The structural design deficiency was later recognized in Bismarck's sister ship Tirpitz and the longitudinal bulkheads were extended into the stern during repairs in Norway. In fairness, it must be noted that welding was a new technology in ship construction in the 1930s and that other German and foreign warships also experienced cracks in welded joints after sustaining damage. There is also evidence that welding failures occurred in the torpedo bulkhead in Compartment VII where it was necessary for damage-control teams to insert hammocks in the cracks of the welded joints.
Remarkable evidence of the failure in the heat affected zone of the welded seam at Bismarck's stern was observed on the seabed in 1989. A large piece of plate from the port side shell just aft of the Steering Gear Room was found in the debris field. We could absolutely identify this plate by a unique row of portholes and a straight edge, which gave clear evidence of structural failure in the welded joint. One jagged end had a large hole, which we believe resulted from a 16-inch shell hit. The authors were aware of the severity of the damage in the stern end from 1983 correspondence with Wilhelm Schmidt, who was the leader of the damage control team aft and from testimony of British observers aboard Rodney.
It is important to remember the relatively close ranges at which this last battle was fought. Bismarck's side armor was theoretically vulnerable to the 14-inch guns of the King George V inside ranges of 15,000 yards and vulnerable to the 16-inch guns on Rodney at even greater ranges.
As a practical matter, Bismarck was vulnerable to penetration by British heavy caliber shellfire throughout almost all of the final engagement. Most of the battle was fought at very close ranges and the resultant flat trajectory fire was very likely to ricochet off the surface of the water. This prevented many hits on Bismarck's underwater hull as shells falling short would probably ricochet and careen into the upper hull or superstructure instead of penetrating the surface. Many shells ricocheted off the 50mm main deck armor and there were a few penetrations of the deck armor. According to Seaman Paul Rudek, who escaped from the Forward Main Battery Plotting Station in Compartment XV, the scene between the upper and lower armor decks was indescribable. He and his chief petty officer made their way to the main deck and escaped from Bismarck from her starboard side. Hatches and doors between these decks had become jammed due to distortion and heavy wreckage which lay in the way.
We did find evidence of penetration of the upper side belt on the port side in way of the forward superstructure and stack. There were at least four shell holes in this 145mm belt clustered around Turret 64. The starboard side upper belt armor could be examined for only a limited distance aft of Turret 65 where a few gouges were noted. This was the side of the Bismarck that was primarily engaged by heavy cruisers Norfolk and Dorsetshire.12
Almost all the German survivors came from battle stations below the armor deck or from a few fortunate locales that were not hit, such as Baron von Müllenheim-Rechberg's after director station, which had enough armor to initiate heavy caliber shell fuze action, but not enough to keep such shells from penetrating.
We have examined the available evidence for a Bismarck battle-damage analysis (Refs 12, 13, 14, 15, 16 and 17). An overall view of the Bismarck around the time of her sinking is presented in Section VIII of this article. A tabulation of the more important hits follows:
- The bow anchor and mooring casting with the spare anchor and jackstaff were all missing. A large jagged hole was left in the stem.
- All three anchors and their chains are missing. Part of the starboard chain remains, tucked into an oblong hole in the Main Deck forward of the starboard anchor windlass. This hole is approximately 2-3 meters long and half a meter in width. The teak deck around the hole is missing and charred. We believe this hit came between 0945-1000, when Rodney was off Bismarck's starboard quarter. Such a hit may have started a fire in the berthing spaces below.13
- A shell (possibly 14-inch, according to the King George V gunnery report) hit near the top of the barbette of turret Bruno and tore away a large piece of 340mm armor some 700mm along the circumference. At the aft port quadrant of the barbette there is a large hole where the Main Deck plating was ripped away from the barbette. Mr. Statz states that he was able to look into Turret Bruno, as this turret's rear wall had been blown away. The turret was also pitched forward on its barbette, indicating an internal explosion. Survivor reports indicated that Turret Anton also showed evidence of an internal explosion, but this cannot be confirmed.
- Oblique video views indicate that the after port side of the forward conning tower was hit repeatedly. As many as 25 shell and fragment holes are apparent in the field of vision. There was a large hole punched into the 350-mm armor plate on the portside by several 14-inch shells from King George V before she ceased fire around 1014. The number of penetrating hits, as opposed to surface-marring fragment splashes on the armor, cannot be conclusively determined, due to shadow effects and the oblique angles of view. Mr. Statz, who viewed this damage from both the outside and inside, has indicated that the port side of the conning tower looked like "swiss cheese." The heavy armored door on the port side of the conning tower is missing from its frame and massive hinges and is lying on the deck of the wrecked bridge structure nearby. This slab of armor may have somehow been entangled in adjacent damaged structure, finally coming to rest in an opening to an inclined ladder just aft of this position. The presence of this door suggests that the capsizing of Bismarck may have been limited to less than 90 degrees. Penetration of the 350-mm vertical armor of the conning tower armor was possible by Rodney and King George V, especially during the later stages of the action when the Bismarck was, to all intents and purposes, defenseless.
- The forward superstructure was ravaged by shell hits from the main and secondary batteries of the two British battleships. These hits tore away superstructure plating and stiffeners, as well as the louvers for the forward boiler intakes. Several of the latter were found in the debris field. These hits undermined the support for the forward bridge tower (command tower), which collapsed and broke away from the hull at the level of the lower bridge deck (USN 02 Level) when the ship capsized. Remarkably, the Admiral's bridge sustained very minor damage, the only level of the forward superstructure not devastated by shell hits.
- The 105mm gun turrets on the port side forward were heavily damaged and unrecognizable. All that remains from the second 105mm turret on the port side - Turret 44 - is a plate from its undercarriage. Mr. Statz confirmed this from his own observations aboard Bismarck that fateful May morning.
- The forward 15cm turret (Turret 62) on the port side was wrecked by British shellfire and was covered by debris from the forward superstructure and parts of the port aircraft/boat crane before Bismarck capsized. The after section of the 80mm armored roof is missing, presumably removed by an ammunition explosion within the turret. The right side 80mm armor plate has been riddled by shell hits and fragments. With a large number of holes in the side armor and the after roof missing, the interior of the gunhouse is visible. Turret 62 is trained well aft, with its guns pointing towards Bismarck's port quarter. Survivors reported a severe fire in this turret's magazine and Mr. Statz was personally ordered by his superior, Chief Petty Officer Gerhard Sagner, to flood its magazines, which would have contributed to the port list. The side of this turret is much darker than the surrounding structure. This is a consequence of a severe fire that raged inside and outside the gunhouse. As the deck is covered with silt, it was difficult to determine just how much of the wood deck was destroyed by fire and shells. According to British gunnery reports, there was a large fire in this area.
- The orientation of Turrets 62 and 64 changed as Bismarck capsized and sank. The loss of Turret 62's after roof plate affected the center of balance of the gunhouse, making it front heavy. We believe that this turret, originally pointed forward, swung outboard during the capsizing and sinking process. Because the ship settled stern first, the gunhouse then rotated another 45 degrees before coming to rest as it is now, pointed towards the port quarter. We believe Turret 64, on the other hand, was shoved inboard by hydrodynamic forces during capsizing, coming to rest with its guns pointing forward instead of abeam.14 The rotation of these turrets attests to the great forces exerted on Bismarck during the capsizing and sinking process and probably explains why the stack, mainmast and forward command tower were missing on the wreck when Dr. Ballard's cameras came upon it in June 1989.
- Most of the barrels of the 150mm turrets appear intact. The guns of after starboard turret (Turret 65) appear damaged. The most serious damage to an individual secondary turret was to the one on the port side forward.
- There was severe damage to the base of the funnel and upper portions of the forward superstructure. This resulted in their separation from the main hull upon impact with the water surface during capsizing or from differences in buoyancies. No traces of either the funnel or the upper forward superstructure were found in the debris field. They could be buried in the sediments from the landslide caused on the seamount by the impact of the turrets and main hull. The forward antiaircraft control positions were totally destroyed, with a large hole in the base of the starboard one obviously caused by an explosion of 105mm ready service ammunition in the superstructure. We were surprised to find that although the metal covers were intact at the time of sinking, the forces of the sinking caused them and the equipment they protected to fall away. The two forward hangars were obliterated and reports of survivors indicate that the aircraft burned in severe fires in this area of the ship.
- The splinter and main side armor belts, particularly on the port side, showed evidence of penetration, especially in the vicinity of the port forward and amidships 150mm turrets (it is important to note that available imagery of the hull of the wreck of Bismarck is minimal). We believe several heavy shells struck aft of the port forward 150mm turret and penetrated into the ship. Splinters from these shells could have caused the ignition of ammunition in the 150mm magazine for turret 64. Mr. Statz has independently confirmed our analysis.
- There were several shell holes in the aft aircraft hangar and considerable damage to the boat stowage and searchlight platforms over it. The forward bulkhead and doors to the hangar were undamaged, but we believe that anyone seeking shelter within this space was probably killed or injured by shells exploding within. The main mast, located over the hangar, was damaged by shell fragments and severed at its base at the hangar roof. There were numerous holes in the stub of the mast left on the ship.
- There was a large hole in the vicinity of the amidships catapult on the port side. The size of this hole was perplexing, if it was caused only by shell hits. Upon further analysis, we have concluded that this hole was probably caused by the last torpedo hit on the portside by cruiser Dorsetshire. Information from Mr. Statz has indicated that listing was at 15 degrees when he jumped into the sea at 1030. Dorsetshire's action report states that she made her final run on the port side of Bismarck at 1034, with the torpedo set for a depth of 16 feet. Observers on the British cruiser noted that the torpedo struck amidships. We are now almost certain that this torpedo hit just below the outboard edge of the Aufbaudeck (USN 01 level) near the port catapult position. A 15-degree list to port and water surge into the ship from the 25-45 foot waves makes this a likely event. Most of the energy of the torpedo explosion (750 pounds of TNT) was vented upwards, but there was sufficient energy left to cause the large hole in the Aufbaudeck seen in the overhead view of the damaged Bismarck. This torpedo hit, although not decisive in sinking the ship, did serve to accelerate the capsizing process already underway.4a
- Many of the 105mm and 37mm gun mounts were missing one or both of their barrels and two 105mm mounts were virtually obliterated. The 37mm gun mounts near the bridge were severely damaged and then swept overboard during the gunnery action. A barrel of one of these mounts is located just aft of the forward conning tower on the starboard side. Mr. Statz remarked to the authors that he distinctly remembers noticing their absence as he escaped from Bismarck via her bridge. Mr. Statz also provided us with the testimony of Seaman Theo Klaus, who was part of the gun crew for 105mm mounts 41 or 43. Mr. Klaus noted that a major caliber shell struck near the base of the starboard antiaircraft director and left a large hole as it detonated 105mm ready service ammunition stowed in the area.
- There is evidence of a 14-inch shell hit on the face plate of turret Caesar while it was trained towards the port bow. There is a massive semicircular "splash" of fragment holes in the Aufbaudeck (USN 01 Level) where the face plate of this turret would have been positioned. We know from survivors of Turret Caesar that the shock effect of this hit disabled the turret elevating and training machinery.
- There were three shell hits in the barbette of turret Dora. We believe these to have been from the Rodney. Two of these were penetrations that one survivor believed could have started the fire in the magazine of turret Dora, as reported to the authors by Wilhelm Schmidt. The shell hit on the forward port quarter demolished a segment of the 340-mm barbette armor and ripped a large hole in the Main Deck.
- There was evidence of only a few shell or splinter holes in the Main Deck, but some of these could have been covered by sediment now on the wreck. The teak deck is remarkably intact in those areas unaffected by battle damage. Teak is resistant to wood boring organisms, unlike the pine decks of the Titanic. There was extensive fire damage to the wood deck around turret Anton, the aft port quadrant of turret Bruno and the forward port quadrant of turret Dora. The Main Deck of the wreck is not littered with debris, as had been the situation before the ship capsized and sank.
- The deck plating on the lower bridge deck outside the forward conning tower had two large gashes on the port side and the bulwark on the port side was pushed in. There is a large hole in the superstructure below the port bridge wing. We believe that two 356-mm shells caused this damage to the deck plate and so weakened it that the bulwark collapsed downwards, away from the conning tower surface, on impact with the water. Lighting and shadow effects make analysis of imagery of this area difficult. Mr. Statz has confirmed that these two hits came during the last minutes of the gun battle when both British battleships were at point-blank range. Navigational equipment on the open bridge and inside the conning tower was obliterated by the time he arrived there. He is convinced that earlier hits killed all the ship's command personnel and the Admiral's Staff, including most of those on the open bridge.
- The remains of what Mr. Statz and we believe was the port boat and aircraft crane now rest on the open barbette of turret Caesar. The violent inrush of water during the sinking process and the partial buoyancy of the crane's boom could have caused this. Mr. Statz has told the authors that the starboard crane had been totally destroyed before he left the ship around 1030.15
- Although we were not able to observe any shell holes around the port side of the aft aircraft hangar, we do know that a 14-inch shell fired by King George V about 1000 was responsible for the deaths of about 100 men, including the executive officer, CDR Hans Oels. This shell easily penetrated the upper citadel belt (145mm KC) and exploded in the ship's after canteen, some 20-30 feet inside the ship.
Mr. Josef Statz and two shipmates escaped from the Damage Control Central, which was located at the base of the communications tube to the forward conning tower. Statz and his companions climbed up this narrow 750mm diameter tube containing vital electrical and control cabling. He made his ascent in a listing, rolling, and pitching ship. When he arrived at the access hatch to the forward conning tower, the scene before him was one of utter and complete desolation. All of the ship's control equipment was demolished and in two piles of rubble forward and aft of the hatch from which he was about to emerge.
The conning tower interior was wrecked and the deck creating the two-level interior structure had disappeared. Light was streaming in from holes in the roof armor, where the forward rangefinders had been located, from the riddled port side armor, and from the forward end, where the deck had separated from the vertical 350mm armor. Above all, the din of battle was deafening. Just as he was about to emerge from the hatch into the conning tower, a 14 or 16-inch shell struck the outer surface of the 350mm vertical armor.

Mr. Statz recalls he was momentarily stunned by the shell's explosion and subsequently received a wound some 8-inches long in his left shoulder from a shell from Dorsetshire which passed into the conning tower through the open starboard door. Fortunately, Statz was wearing a leather jacket, while his two friends wore nothing but undershirts to cover their upper torsos. Both these men sustained serious wounds. It took several minutes for Mr. Statz to regain his composure. He was brought back to reality by the voice of an old friend, Lt. Friedrich Cardinal, who had escaped from the forward Main Battery Plotting Station. "Did they get you, Slim?", the officer asked. Cardinal, along with Statz and two seamen named Moritz and Seifert, crawled out of the conning tower onto the port side of the wrecked bridge. Mr. Statz still remembers the very fine red dust on this deck. The group made their way forward and escaped through an opening between the deck and the forward bulkhead of the conning tower.
Shortly after they pulled Moritz to a sheltered position, he died of severe chest wounds. Seamen Seifert lost his senses when the British battleships resumed fire around 0950 and tried to escape by a desperate dive to port from the open bridge. He died as he plunged onto the wreckage below.
Mr. Statz and Lt. Cardinal were alone on the open bridge, although they did encounter a severely wounded officer with four stripes near the port bridge wing. When the British battleships began their final bombardment, the two men decided to move to the starboard bridge wing of the open bridge. There, they tried to find an alternate escape route. Mr. Statz could not see aft due to the heavy black smoke exiting from the base of the funnel. He noticed a large hole near the starboard antiaircraft directors, where all but one of the 105mm starboard gunnery crew escaped. Finding no route down, Statz and Cardinal headed back to the open bridge.
There Statz looked into the open starboard door of the conning tower and noticed five bodies of comrades from Damage Control Central who had escaped before him, one of these being LCdr. Emil Jahreis, his commanding officer and a close friend of the Baron. Lt. Cardinal restrained Mr. Statz from reentering the conning tower, but these two men were forced to take cover quickly as the British battleships and cruiser Dorsetshire began their final close-range passes up the sides of Bismarck. Taking cover behind the forward bulwark of the open bridge, Statz and his shipmate could follow the heavy shells on their trajectories to their impact points on the bridge and conning tower. The terrible noise of these projectiles forced Mr. Statz to stand up and scream in terror. Several shells punched holes in the 350mm armor. Two hit the port bridge wing and carried away the officer they had passed by before.
Once the shelling was over, the two men made their way around the portside of the conning tower and escaped down to the Aufbaudeck (USN 01 Level). From there they jumped onto the middle 150mm turret and dived into the ocean from between its barrels. Mr. Statz was picked up by Dorsetshire, but Lt. Cardinal committed suicide in the waters around Bismarck with a gunshot to his head. This act was one that has haunted Mr. Statz ever since. For a man to have survived such a holocaust and then to commit suicide, just did not seem rational.
The escape route of Baron von Müllenheim-Rechberg was not as dramatic as the one taken by Mr. Statz. After calling Damage Control Central, the Baron found that the ship was being scuttled. Mr. Statz was the man who answered the telephone and it was not until a reunion some 40 years later that they finally met each other! Selecting an opportune time for escape, the Baron and his party left the Aft Command Station shortly after Dorsetshire ceased fire.
The scene outside was out of Dante's Inferno and utter desolation. The protective hood for the aft secondary battery director was still in place, but the machine guns, searchlights, ladders and most other light equipment had been shot away. There were numerous shell holes in the deck and debris was everywhere. One had to be extremely careful not to step into shell holes and plunge into the fires below.
Making his way to an area near the aft 380mm turrets, the Baron noticed serious damage to the main battery turrets. Turret Dora had had one barrel shredded by a direct hit. Turret Caesar seemed untouched, but was silent and its side was blackened with the paint burned off. Resisting the urge to return to his stateroom and pick up some personal belongings, the Baron made his plunge into the sea from the starboard side. He too was picked up by Dorsetshire.
Both German gentlemen are grateful to their British rescuers. Had they not been picked up by the Royal Navy, they would soon have died from hypothermia. Tragically, some 800 survivors of Bismarck had to be left to their fates by destroyer Maori and cruiser Dorsetshire when lookouts reported that they had spotted a periscope.
Dr. Ballard's discovery of the wreck of the Bismarck has tremendously increased public interest in the dramatic Bismarck saga. To Dr. Ballard's surprise, his discovery has intensified an old debate as to who sank the ship.
One of the questions we are often asked is, "Did the British sink Bismarck, or did the Germans scuttle her?" Our answer to both these questions has always been
"YES."
Based on the condition of the hull, especially in comparison to the after portion of the Titanic's hull, the testimony of Mr. Josef Statz, Wilhelm Schmidt, and Gerhard Junack and the author's examination of the damaged stability analysis of Bismarck, there is no question in our minds that scuttling charges caused the ship to sink at 1040.
Note:
The outboard profile and overhead view shown below represents the condition of Bismarck as she might have looked to HMS Dorsetshire after she had fired her last torpedo. The orientation of the main battery turrets has been corroborated in detail by survivor testimony. The other damage has been postulated based on survivor testimony, Royal Navy eyewitness reports, and detail analysis of photographic and videotape records of the condition of Bismarck's wreck.


Mr. Statz has provided detailed sketches of damage, as he recalls it. In several instances, we have been able to use videotape and still imagery from the Ballard Expedition to validate the remarkable accuracy of this elderly gentleman's memory. It should be noted that the water surface had almost reached the level of the Aufbaudeck (USN 01 level) by the time he made his escape over the port side from the roof of the amidships 150mm gun turret. Locations of shell hits from Prince of Wales and the torpedo damage from the Swordfish aircraft from Victorious are only approximate, as the underwater hull of the battleship is buried in the silt of the seabed. There is persuasive evidence that there were some penetrations of the 320mm main side belt and the 145mm upper citadel belt by heavy shellfire from the two British battleships.
The damage to the superstructure is at best an approximation. The effects of multiple shell hits must have been much as is shown here. Quite possibly, as many as 300-400 shells hit Bismarck. A more precise analysis is impossible, due to the substantial portion of the superstructure that is missing and the absence of the four main battery turrets, all of which are buried in the sediments around the battleship.
Bismarck was a sinking ship, and her scuttling merely hastened an inevitable demise. Bismarck had been decisively defeated by the gunfire from her British opponents. The order to scuttle the ship was given at 0930, about 45 minutes after the start of the gunnery action, after all main battery turrets were out of commission. By this time, the ship was a total wreck, incapable of defending herself.
By 1000 on 27 May, only one 20mm gun remained operational on board Bismarck. All the 380mm, 150mm, 105mm, and 37mm guns had been disabled. Some shells had holed the armor belts and water was flooding compartments below. Fires had occurred in turrets Bruno, Anton, and Dora; and several 150mm, 105mm, and 37mm magazine fires had forced flooding of magazines to prevent explosions.
The design of Bismarck was vindicated as quite damage resistant; this battleship absorbed a remarkable amount of punishment before succumbing to overwhelming damage. As has been discussed, Bismarck was unusually (perhaps excessively) stable, and the British somewhat hindered their efforts to sink her by bombarding both sides of the ship. Effectively, starboard side battle drainage provided counterflooding to offset the massive damage and flooding being sustained on the port side.
It is interesting to note that auxiliary and machinery spaces in Bismarck were equipped with a small rectangular white box labeled with a red "V" (abbreviation for "Versenken" = Scuttling). The box contained six dynamite sticks, a timer, and a percussion fuze to be placed on inlet sea valves and condenser inlets when the scuttling order (Measure "V") was given. To our knowledge, this procedure was carried out successfully in the center machinery space, the aft port turbo-generator room and perhaps in several other machinery spaces as well. In some compartments, flooding pumps were reversed and charges did not have to be placed. In other spaces, flooding was already occurring and access to scuttling charges was impossible and unnecessary.
Dr. Ballard was surprised at the relatively intact condition of the wreck. The ship showed no implosion damage like that found on the after portion of Titanic. Despite her quick plunge to the bottom, which we estimate took about 6 minutes, Bismarck's hull is upright in bottom sediments in reasonably good condition, but minus the stern. This strongly suggests massive flooding/scuttling prior to sinking; structural implosions occur only when intact watertight compartments are crushed by increasing water pressure as a sunken ship plunges to the seabed.
The effort to locate the wreck of Bismarck was complicated by inaccurate British position reports obtained during the stormy conditions that had persisted in the days preceding the final gunnery engagement, such poor conditions that unreliable and inconsistent dead reckoning estimates of position were all that was available. On the morning of May 27, 1941, of course, the immediate concern was the position of the British ships relative to the German battleship, not their absolute geographic positions.
Dr. Ballard's expeditions in 1988 and 1989 used the best available location data, which was not very good. As a result, a search of approximately 100 square miles of seabed was necessary. The difficulties of this search were further compounded by the rough terrain of the seabed. Bismarck actually sank on top of a seamount and slid down its side to her final resting place.
The debris field associated with the wreck of Bismarck is chaotic and rather localized, an exception to the norm.16 This unusual situation is explained by the fact that Bismarck was making virtually no forward speed during her last battle while debris from the ship was continually raining down on the seabed below. Late in the engagement, the devastating close-range gunfire from King George V and Rodney often was tearing structure away, and rearranging debris from earlier hits.
Most charts showing the movements of Bismarck during her final battle probably exaggerate her movements - in fact, the ship was only steaming at "ahead slow," good for about six knots in calm seas. In the howling gale pertaining at the time, the ship probably was barely moving relative to the seabed below (see the track chart in VI. The Final Battle).
The debris fields of warships sunk in battle may very well not be as structured and searcher-friendly as those associated with merchant ships. Locating warship wrecks will probably be much more difficult than locating the wrecks of merchant ships.
There are a number of technical, design, and operational lessons that can be learned from an analysis of the Bismarck story. These are:
Torpedo damage was a critical factor in the destruction of the Bismarck. Overall, we believe that the German battleship sustained a total of six or seven torpedo hits:
1. One torpedo from Victorious aircraft (24 May) struck the main side belt on the starboard side in way of the foremast, causing minimal damage.
2. One torpedo from Ark Royal aircraft (26 May) detonated just below the main side belt on the port side, outboard of the port engine room in Compartments VII or VIII, causing moderate damage and flooding. Tearing in the welded seams of the torpedo bulkhead in Compartment VII was reported to Damage Control Central. Flooding occurred in the port shaft alley.
3. One torpedo from Ark Royal aircraft (26 May) doomed the battleship, detonating on or near the port rudder, about 1-2 meters aft of the aft armored bulkhead of the steering gear complex. The steering system was wrecked, with the rudders irretrievably jammed at 12 degrees to port (evidence provided by Baron von Müllenheim-Rechberg).
4./5. Two torpedoes from Dorsetshire (27 May) struck on the starboard side, probably hitting the hull at or below the turn of the bilge as the ship was listing heavily to port.
6. A final torpedo from Dorsetshire (27 May) hit on the port side amidships. This was a shallow runner and actually hit on the 01 level of the listing, sinking the battleship.
7. One torpedo hit was claimed by Rodney around 1000 while she was off Bismarck's starboard side. While this hit cannot be absolutely confirmed, because of the incredible number of shell splashes occurring at this time, we consider this hit to be a probable. If it did happen, it certainly supplemented the Germans counterflooding efforts, which had ceased by 0930 and, ironically, prolonged the sinking process.
In general, the side protective system of Bismarck performed well against gunfire and less effectively against torpedoes. The devastating hit aft was far beyond the end of the side protective layer. Space and volume constraints limit the application of side protective systems to just over half the overall length of heavy ships and smaller ships are only protected by subdivision. No information on the torpedo hits claimed by Rodney and Dorsetshire can be confirmed. These two ships fired 20 torpedoes in the direction of Bismarck. However, the erratic movements (particularly pitch and yaw) of Bismarck and the prevailing gale storm conditions, make any hits from these torpedoes fired by destroyers during the overnight battle unlikely.
The wreck of Bismarck is upright, embedded in silt to about the normal waterline. It will probably never be possible to determine with more accuracy the performance of the battleship's side protective system during her sortie into the North Atlantic. Analysis of survivor testimony has led us to conclude that the German battleship's torpedo defense system was only marginally effective against British aerial torpedoes and vulnerable to surface-launched torpedoes containing greater explosive charges.
The Radar used by the British heavy cruisers had dramatic psychological effects on the Germans on board Bismarck. Admiral Lütjens was shattered by his difficulty in breaking British radar contact. Several months earlier, while commanding the Gneisenau/Scharnhorst raid into the North Atlantic, the Admiral had been certain German radar equipment was easily superior to that of the British. In May of 1941, however, he was disheartened by the obvious superior performance of the new British radar installations.
Prince of Wales successfully used her Type-284 radar set to determine ranges to Bismarck in the action on 24 May 1941. The gunnery officer used his radar to confirm ranges obtained by his coincidence-type optical rangefinders (Ref. 17). This is why the Prince of Wales, despite her crew's inexperience in gunnery (she was delivered by her builders only seven weeks before the action), was able to straddle Bismarck early on in the action and obtain two decisive hits.2a A third 14-inch shell damaged one of Bismarck's boats.
Bismarck's "Seetakt" radar was put out of order by the shock or blast from her 380mm guns. Although there had been gunnery practice in the Baltic before her sortie, the rapid firing of these guns against Norfolk on 23 May produced conditions not experienced before. No one survived from the gunnery department who could provide evidence on the exact cause for the radar failures. We know from Baron von Müllenheim-Rechberg that all ranging to British ships in the actions of May 24 and May 27 was accomplished by stereoscopic rangefinders.
There was definitely a major distrust of unproven equipment aboard ships in 1941. Radar was a new development, and both Vice-Admiral Lancelot Holland aboard Hood and Admiral Lütjens aboard Bismarck ordered their radar sets secured for fear they would give away their positions. Neither admiral knew the limitations of range for these early radar sets.
Since radar was new in 1941, only a few British ships and aircraft were equipped with it. Several of the Swordfish torpedo bombers from Victorious and Ark Royal were equipped with radar and tried to attack friendly ships in the battle area, since there were no Identification Friend or Foe (IFF) systems available at the time. The use of radar to locate Bismarck in May of 1941 was a noteworthy achievement in the history of the evolution of radar.
The Status of the propulsion plant has been analyzed in detail, primarily based on dialogue with Bismarck survivors, supplemented by original sources. Surprisingly, despite the battering sustained by the German ship before her sinking, most of the engineering spaces appear to have continued to function until the scuttling charges detonated or the ship capsized and sank.
Few shells appear to have penetrated to the machinery or magazines within the armored citadel. The 320mm armor plates of the main side belt, supplemented by the 110-mm armor slopes to the lower edge of the main armor, appear to have performed as designed. There were few photographic or video images showing the main side belt, so analysis of such limited evidence is inconclusive. At the close ranges at which the battle was fought, the British 14-inch and 16-inch guns were capable of penetrating the main side belt armor, but the side armor/slopes combination appears to have been infrequently penetrated, if at all. The armor system on Bismarck had been optimized for effectiveness in relatively close-range gunnery actions, although it was inadequate to protect against long-range shellfire. The fragmentary information now available indicates that the propulsion plant continued to operate throughout the action, with only two shells having penetrated into this complex.
An order came from the bridge around 0600: "All engines stop!" This order was not reversed. About 0700, Lt. Gerhard Junack, who temporarily relieved LCdr. Walter Lehinaun, the chief engineer, spoke with Capt. Ernst Lindemann on what should be done with the turbines. Junack was concerned about damage to the hot turbine machinery caused by thermal distortion if it remained inactive indefinitely. The Lieutenant explained his concerns to the Captain regarding the turbines, and the conversation concluded as follows: Junack: "Captain, I recommend an order for 'Ahead Slow'." Lindemann: "Ach, do as you like!"
This response reflected the mood of despair on the bridge. Lt. Junack ordered "Ahead Slow," adequate for a speed of something less than six knots in calm seas.
The distracted officers and men on the bridge of Bismarck failed to observe the British heavy cruiser Norfolk, which mistakenly closed to within 15,000 meters of Bismarck about 0700 that morning. Norfolk actually signaled to Bismarck in the belief that she was King George V!
For all practical purposes, although ten boilers were in operation at the start of the final action, Bismarck was virtually stationary and moving in an erratic manner, due to the stormy sea conditions (Beaufort sea state 6 or 7) and the lack of steering.
Welding was a new technology in 1936 when Bismarck was designed. Unrealistically-demanding production schedules led to poor welding, which was exacerbated by cold temperatures which created brittle failure conditions which were encountered in a number of faulty welds after battle damage. If the Bismarck wreck is ever revisited, we recommend a close examination of the main deck and side shell plating aft in the area of the failed stern to confirm the fatigue failure in the stern section. Close examination of the shell plating at the intersection of the hull with the seabed might provide more information on just where the fatal torpedo hit occurred.
Structural design details are critical factors in the capability of warships to sustain battle damage and survive. Wherever possible, structure should be continuous with no sharp breaks or discontinuities. Structural openings in the hull should be reinforced. This deficiency in German warship construction practice of the Bismarck-era created areas of high stress which exaggerated damage effects. As far as we know, the Germans were aware of these problems and corrected most of them in Tirpitz while she was in Norway.
Redundant structure is a key factor in successful warship design. The structural failure of Bismarck's stern, discussed in detail earlier, is an outstanding example of inadequate structural redundancy. There were no continuous longitudinal bulkheads in the stern aft of the steering gear room, precisely where the fatal torpedo struck. This design defect, massive shell plating damage, stress concentrations and transient whipping phenomena, made the collapse of the stern inevitable.
Side protective system design was a major consideration in the development of battleship designs. The designed resistance for the Bismarck system was 550 pounds of TNT. This system featured only two bulkheads.17 Although the main side belt armor was arrayed vertically on the exterior shell plating, the Germans and British both used light armor on the bulkheads in their side protective layers to add a degree of ballistic protection. The German design theory for torpedo defense systems was based on tests on sections on the old pre-dreadnought Preussen in the early 1930s.
Bismarck's side protective system consisted of two layers, with the outer layer designed to be kept void and the inner layer designed to be filled with either fuel or ballast water for the system to perform as designed. Such a configuration is normally considered poor design practice, for it permits the direct transmission of damage to the bounding (inner) bulkhead under torpedo attack. American and British designs of this era featured void inboard compartments just outboard of the bounding bulkhead. The figure below depicts the results of underwater explosion tests on a Bismarck caisson in 1938.

A 14-inch shell from Prince of Wales fell short, followed a short underwater trajectory, passed under the main side belt, penetrated the side protective system of Bismarck and detonated on contact with the 45-mm inner bulkhead. Unfortunately for the Germans, the shell struck at the boundary of Sections XIII and XIV, near an intersection with a major transverse subdivision bulkhead, causing tears to develop in the welded joints and the plating of the transverse and longitudinal (inner) bulkheads. Slow flooding ensued, eventually causing the loss of a generator room and one of the firerooms. This hit revealed a deficiency of the Bismarck armor system-inadequate lower side belt armor protection against plunging shellfire.
Rudders and steering gear are an unavoidable Achilles heel in the protective design of warships. The Bismarck episode has shown that auxiliary steering devices for warships are desirable attributes if space and weight are available and if the systems can be made moderately effective. Auxiliary rudders can have a place in modern warship design. The auxiliary propulsion devices fitted to the FFG 7 Perry-Class frigates and the Spanish aircraft carrier Principe De Austrias are examples of such systems. However, these systems absorb space and weight, premium items in modern combatant ship design.
The arrangement of the steering gear of Bismarck contributed to her demise. The two rudders had to be located very close together in order to be positioned properly in the propeller races. It is possible that the torpedo hit aft damaged both of Bismarck's rudders. In American battleships with quadruple screws the rudders were spaced further apart. The twin skeg arrangement of later American battleships, also used on the Midway class carriers, contributed a degree of protection to the shafting and provided better flow to the rudders and propellers. The Iowa-class battleships, for example, could outmaneuver most destroyers of the World War II-era and care had to be exercised by destroyer skippers when maneuvering close to these ships.
Bismarck was equipped with push button steering, as were all German warships of this period. The helmsman would hold both hands on to a bar and with the palms of his hands press down on switches to turn port (left hand) or starboard (right hand). With the din of battle and the necessity to read the rudder indicator to determine his rudder positions, undoubtedly the helmsman, Quartermaster Hans Hansen of Bismarck, was hard pressed to make the maneuvers ordered by Captain Lindemann during those crucial moments when she was under torpedo attack. Modern German warships have abandoned this concept as part of a human factors evaluation.
Smoke enshrouded the sinking Bismarck, due to extensive fires throughout the ship and the fact that all her forced draft blowers had been disabled, causing the boilers to operate without adequate air intake. In addition, according to Mr. Statz, there were fuel-oil fires in some of the boiler rooms. The stack was riddled and was so weakened structurally that it sheared off at its base when Bismarck capsized.
So much smoke was pouring from riddled uptakes that carbon monoxide gas entered holes aft of the stack and asphyxiated men not using gas masks. Paint in this area was also burning. Mr. Statz has noted that Compartment XIII on the armor deck had such a massive concentration of gas and fumes that he was unable to move to the after part of the ship.
Command and control spaces are always key targets for enemy fire. During the battleship era, relatively heavily-armored conning towers were normally provided to protect key personnel. Bismarck's conning tower was shielded by 350mm armor, which was riddled by close-range British battleship gunfire. Stability considerations often influenced the design of conning tower protective schemes. The British radically sacrificed such protection and all but two personnel on the unarmored bridge5a of Prince of Wales were killed by a dud 380mm shell fired at long range. Maximum attention must be paid to protecting these key functions, by dispersion and by locating key elements below the waterline, for example.
Corrosion has taken a remarkably modest toll on the wreck of Bismarck, despite the passage of 50 years. The face-hardened armor shows rusticles on the barbettes and main side belts. This may be due to galvanic corrosion, since the face hardened armor and the high strength steel backing structure are somewhat dissimilar metals. Inevitable irregularities and small cracks in the surface of face hardened armor also can foster corrosion and the development of rusticles.
Other surfaces show remarkably less corrosion than was observed on Titanic's hull. This was probably because the paints have adhered better, the wreck had 30 years less time on the seabed and the greater depth inhibited deterioration. The teak decks, in areas not damaged by shellfire or fire, are in a remarkable state of preservation.
The overall superior condition of Bismarck can be attributed to advances made in paint and preservative technology from 1932-1939.
We are often asked how Bismarck or Tirpitz would fare against an Iowa-class battleship. Generally speaking, this question is easy to answer as follows:
"Not very well!"
The American Iowa-class battleships were armed with powerful, long-ranged 16-inch guns which fired a heavy 2,700-pound armor-piercing shell and benefited from a superior gunfire control system. Furthermore, the Iowas were capable of 33-35 knots maximum speed. Their higher speed and superior horizontal armor protection would have given the Iowas an immense tactical advantage in a long-range gunnery engagement. Their high speed would have granted the Americans choice of engagement and they would have been able to dictate the range at which to do battle. At long ranges, the American 16-inch guns could penetrate Bismarck virtually at will, while the German 380mm gun could only hope for combat system kills against the always vulnerable superstructure of any battleship. U.S. Navy doctrine in the period leading up to World War II was to attain great gun accuracy at long range, for that is where American admirals wanted American battleships to engage a potential foe. By 1944, with their clear advantage in radar technology and superior fire-control systems, the advantage in gunnery engagements would have been conferred even more markedly on the U.S. ships.
The German ships were admirably suited to a close range battle, such as might be expected in the pre-radar era in the North Sea. At close ranges, the German ships might have had a slight advantage over their American counterparts.
The side protective system of the U.S. ships was superior to that on the German warships, although both classes were equally vulnerable to the type of torpedo hits on the steering gear which doomed Bismarck.
Overall, although one can never predict the outcome of a one-on-one engagement with certitude, it is clear that the odds in any such a confrontation would have substantially favored the American ship.
Delays in executing Operation Rhine Exercise meant that it took place in northern latitudes in that part of the year when there were short nights in the northern hemisphere. This was a fateful flaw in the German planning, for it meant British searchers would have near-optimum conditions of extensive daylight. This was particularly underscored by the British acquisition of American long-range Catalinas which had the endurance to search wide arcs in the North Atlantic. The German disadvantage was compounded by the introduction of improved radar systems on some of the British surface ships, as well as American willingness to help in search operations (not very neutral!).
Admiral Lütjens, unaware of a number of these circumstances which increased the odds against his success, was pessimistic regarding his chances of evading the Royal Navy. While visiting Rear Admiral Hans Voss, a long-time friend in Berlin upon his return from the North Atlantic in March 1940, Lütjens told him that he did not think that he would return alive. If the Hood Board of Inquiry had convened with the evidence that is now available on German ordnance, the 8mm film clip taken by Paul Schmalenbach aboard Prinz Eugen and the tracks of the ships involved, it is our belief that it would have found the loss of Hood resulted from the following factors:
- Hood had poor deck protection against the 380mm guns of a Bismarck-Class battleship.
- The 4-inch magazine was the most probable source of the deflagration, with the ignition of a torpedo warhead in a torpedo tube a distinct possibility.
- The tactics of Vice Admiral Lancelot Holland on 24 May are questionable. His approach exposed Hood and Prince of Wales to a probability of hits. Effectively, Admiral Holland offered the Germans the opportunity to "cross his 'T'" by heading almost directly at the German ships.
- Prince of Wales should have been the lead ship during the approach because of her heavier deck armor, better fire-control system and greater number of main battery guns forward.
Bismarck was very vulnerable to long-range gunfire. Admiral John Tovey's decision to engage her at close range increased the probability of shell hits, but made it more difficult for his shells to penetrate her vitals. Our observation of the wreck indicated that the superstructure was devastated by shell damage. Survivor testimony has indicated that the main battery turrets were all struck by 14 or 16-inch shells and were disabled by 0930. At the time the ship was abandoned by her crew, only one 20mm gun was still operational.
Once Bismarck had been put in a near-defenseless posture, her hulk could probably have been quickly dispatched by a concentrated torpedo attack from the portside of the German battleship. Twelve Swordfish aircraft, armed with torpedoes were present in the battle area but were ordered to stay clear of Bismarck, evidently because Admiral Tovey, afraid that they might attack a friendly ship, ordered them away. Torpedoes are a much more lethal threat to warships than gunfire.
Furthermore, with the heavy cruisers firing from starboard and the battleships from port, the British tactics actually prolonged the battle, effectively augmenting the German's counterflooding efforts, which had been abandoned around 0920-0930.
Bismarck stood up well to the punishment she received. The machinery plant remained in operation to the end, but the turrets did receive disabling hits. One survivor remarked that several of Bismarck's turrets were hit by 16-inch shells from Rodney and that the 380mm guns still could be fired, although the turrets could not be trained. Evidence of a 14-inch shell hit on the 340mm KC barbette armor for Turret Bruno is probably from the hit which caused an internal explosion which blew off the 320mm armor backwall. Traces of this armor are in the debris field.
Bismarck was a handsome warship, well designed and well fought during her brief and tragic combat career. She now rests on the Atlantic seabed, upright, defiant and proud; a memorial to the valor of German and British sailors who wrote an indelible chapter in the history of war at sea, now over fifty years ago.

- Top of conning tower tube.
- Location of bodies of 5 crew members killed prior to my arrival.
- Gap between conning tower side and deck.
- Main rangefinder shot away.
- Light penetrated from above this location, i.e., from rangefinder location.
- Deck separated from conning tower side.
- Cracks in vertical surface of conning tower permitted visibility inside.
- Bulwarks shot away (from photographic survey of Bismarck).
- Superstructure shot away
- Trace of heavy projectile hit (from photographic survey of Bismarck).
- Starboard conning tower door blocked.
- Portside conning tower door gone, door opening enlarged.
- Trace of heavy projectile hit (from photographic survey of Bismarck).
- Bulwarks bent down and distorted (from photographic survey of Bismarck).
I have recorded everything to the best of my recollection on the attached sketch. I did not notice any heavy damage to the rear portside of the conning tower. Naturally, the director had been destroyed.
- Emerging from the cable shaft into the conning tower.
- This hit is not recorded in the National Geographic Magazine.
- From here I could see and recognize the 5 bodies of the men from central station. To the right, it was not possible to enter the conning tower as the path was blocked by debris and the bodies of the conning tower crew.
- From here I could once again see the 5 bodies. Therefore something must have happened to the vertical surface on the portside.
- The outline of the vertical portside surface of the conning tower was clearly visible on the deckplanks.
- Damage to the conning tower resulted in a hole in the riddled upper bridge deck, through which we escaped.
- The torn off rangefinder/director resulted in a big hole through which daylight penetrated, which permitted me to recognize the bodies of my fallen comrades.
- The entrances to the conning tower were shot off. This area is where daylight entered the conning tower.
- Area of total blockage. Absolutely no entrance to the conning tower.
- This door, an entrance to the conning tower, was torn off.
- The 60mm armored windscreen was torn off the ceiling of the conning tower.

- 1) 0948: Mr. Statz, following his comrades Seifert and Moritz, arrives in the forward conning tower position and is catapulted out of the opening by a shell hit and ship motions. Moritz is severely wounded by a shell fragment.
- 2) 0950: The men emerged from an opening where the vertical armor had been separated from the deck armor.
- 3) 0951: They prop Moritz against the bulwark, where he dies. They also spot a seriously-wounded officer observing all the action, but unable to talk.
- 4) 0952: Seifert, Cardinal and Statz take refuge in the port wing, but have to move when British battleships begin to fire again.
- 5) 1000-1014: Taking refuge briefly in the starboard bridge wing, they are forced to move aft to seek a means of escape. Seifert goes berserk and dives over the port bridge wing bulwark to his death.
- 6) 1005: Statz and Cardinal move aft to escape downwards, but they find no safe way down due to debris and demolished ladders. With Dorsetshire resuming fire, they are forced to take cover again.
- 7) Moving forward to the starboard open bridge, Statz peers into the wrecked conning tower, where he observes the remains of fallen comrades and his immediate officer superior, LCdr. Janreis, who was a personal friend of Baron von Müllenheim-Rechberg.
- 8) 1014-1018: Lt. Cardinal and Mr. Statz take refuge under the starboard bridge wing bulwark as King George V, Rodney and Dorsetshire commence their final bombardment.
- 9) 1018-1025: The two survivors make their way to port over heavy debris and a severely damaged port bridge wing. Mr. Statz remembers the port door to the forward conning tower blown off (it now lies embedded in the down access ladder, just aft of the conning tower).
- 10-14) 1026-1031 Half climbing and falling, the two men make their way down to the Aufbaudeck.
- 15-16) 1032: Statz and Cardinal jump onto turret 64. At 1035 they leap into the sea between the gun barrels.
The authors of this paper have been fortunate to have had the opportunity to assist Dr. Robert Ballard of Woods Hole Oceanographic Institute, the Quest Group and the National Geographic Society in the discovery and analysis of the Bismarck wreck from June 1989 to February 1990.
Although we did not participate directly in Dr. Ballard's expedition aboard the Star Hercules, we gave advice and counsel to his personnel and did much of the photo interpretation. We were greatly aided by three Bismarck survivors, former German Ambassador Baron von Müllenheim-Rechberg (former LCdr. German Navy) the senior surviving officer, Mr. Josef Statz, who was the sole survivor from Bismarck's Damage Control Central,18 and Paul Rudek, who was from the forward computer room. The Baron and Mr. Statz worked tirelessly with the authors and assisted in the preparation of Mr. Thomas Webb's drawings of Bismarck just before she sank. The help of Mr. Statz has been extremely important, for he was a knowledgeable marine designer who served in an important, if not crucial, space on Bismarck. Mr. Rudek clarified the number of salvos fired at Hood. These views of the damaged Bismarck were prepared after many hours of intensive study of the videotapes and still photography brought back by Dr. Ballard's team from some 15,317 feet below the water surface, 600 miles west of Brest, France. A number of these views have been published in various magazine articles and books (Refs 19, 20, 21 and 22). We have been fortunate in gaining a sound insight into the Bismarck saga from the standpoint of the Royal Navy. For this, we would especially like to thank Admiral of the Fleet Sir Henry Leach and several Prince of Wales officers: Captain Cohn McMullen (gunnery); Commander Arthur Skipwith (executive officer); Lcdr. Geoffrey Brooke (gunnery); and Vice Admiral D.B.H. Wildish (then Lt., damage control). Lcdr. Brooke was extremely helpful in reviewing an earlier version of this manuscript and is also the author of "Alarm Starboard," which was helpful in assessing the events of the 24 May 1941 battle from his vantage point on Prince of Wales.
We also would like to thank Messrs. William Jurens and Nathan Okun for their invaluable assistance. Mr. Jurens' article on the loss of HMS Hood in Warship International, No.2, 1987, was extremely helpful in our analysis of the loss of this battlecruiser. Mr. Okun, an expert on armor penetration phenomena, has completed a remarkably comprehensive and convincing analysis of the ballistic protection of the Bismarck, unfortunately as yet unpublished. Overall, he concludes the ship was not as well protected as her legend would indicate. None of this, of course, detracts one iota from the drama of the Bismarck chase and the achievements of her crew.
Thanks also are due to John Campbell and David Brown for their commentaries on an earlier version of this manuscript.
Wolfgang Reuter, a German-trained naval architect who assisted in this analysis by providing translations and analysis of Mr. Statz' s remarkably extensive correspondence and reports. Mr. Henry Brodersen also assisted in translations.
We especially want to thank our illustrator, Mr. Thomas Webb, for his generous assistance in making areas of the Bismarck wreck, not visible to the camera, come alive to the human eye. Tom was guided by the critique and very helpful assistance of the Baron and Mr. Statz who reviewed his early sketches of the damaged profile and overhead view.
We have been aided in our analysis by our experiences as naval architects and marine engineers. Although some of our analysis is subjective, we have had the opportunity to analyze battle damage experiences of many warships the insights from these analyses have led to many of the conclusions presented in this article.
Comments on our work are welcome, as they can further our understanding of this important naval battle of World War II. In this regard, we want to thank Arthur Sandiford for his comments on our Marine Technology article which improved this article in Warship International. Whenever matters of fact are discussed, specific citations of sources of information would be most helpful.
- Müllenheim-Rechberg, Burkard Baron von. Battleship Bismarck - A Survivor's Story. Annapolis, Maryland: Naval Institute Press, 1990.
- Ballard, Dr. Robert, Discovery of the Bismarck, Toronto, Ontario: Madison press, 1990.
- Ballard, Dr. Robert, "Quest for the Bismarck," (London) Sunday Express Magazine, 29 October 1989 and 5 November 1989.
- Ballard, Dr. Robert, "Finding the Bismarck," National Geographic Magazine, November 1989, pp. 622-637.
- "Die Entdeckung der Bismarck," GEO Magazine, December 1989, pp. 14-36.
- U.S. Navy Department, Bureau of Ships, Preliminary Design Branch, Study of Bismarck. Washington, D.C.: December 1942.
- Dulin, Robert O., Jr. and Garzke, William H., Jr., Battleships - United States Battleships in World War II. Annapolis, Maryland: 1985.
- Garzke, William H., Jr. and Dulin, Robert O., Jr., Battleships - Allied Battleships in World War II. Annapolis, Maryland: Naval Institute Press, 1990.
- Garzke, William H., Jr. and Dulin, Robert O., Jr., Battleships - Axis and Neutral Battleships in World War II, Annapolis, Maryland, Naval Institute Press, 1990.
- U.S. Navy Department, Bureau of Ships, USS South Dakota, Gunfire Damage, Battle of Guadalcanal, 14-25 November 1942, War Damage Report No.57. Washington, D.C.
- Garzke, William H., Jr. and Dulin, Robert O., Jr., "Who Sank the Bismarck?", U.S. Naval Institute Proceedings, June 1992 pp. 48-57.
- Statz, Josef (ex-Bismarck) Letters to Mr. William H. Garzke, 1989-1994.
- Müllenheim-Rechberg, Baron von (ex-Bismarck) Letters to Mr. William H. Garzke, 1965-1993.
- Junack, Lt Gerhard, (ex-Bismarck) Letters to Mr. William H. Garzke, Jr., 1966-1967.
- Schmidt, Wilhelm (ex-Bismarck) Letters to Mr. William H. Garzke, 1982.
- Garzke, William H., Jr. and Dulin, Robert O., Jr., "Review of Dr. Ballard's Photography of the Wreck of the Bismarck for the Battleship Bismarck Survivors' Association," August 1990.
- McMullen, Capt. Colin (ex-Prince of Wales) Letters to Mr. William Garzke, Jr., 1967-1968, 1990-1991.
- Brooke, LCdr. Geoffery, (ex-Prince of Wales) Letters to Mr. William Garzke, Jr., 1990-1991.
- Brooke, Geoffery, "ALARM Starboard," Cambridge, United Kingdom, Patrick Stephens Limited.
- Wildish, Vice Admiral D.M.B. (ex-Prince of Wales) Letters to Mr. William H. Garzke, Jr., 1970-1991.
- Skipwith, Cmdr. Arthur (ex-Prince of Wales) Letters to Mr. William H. Garzke, Jr.
- Garzke, William H. Jr. and Dulin, Robert O. Jr., "The Bismarck Encounter," Chesapeake Section, SNAME, 5 June 1992.
- Garzke, William H. Jr. and Dulin, Robert O. Jr., "The Bismarck Encounter," 10th Naval History Symposium, U.S. Naval Academy, September 1991.
- Jurens, William J., "The Loss of HMS Hood - A Re-examination," Warship International, No.2, 1987.
- Okun, Nathan, "Armor Protection of KM Bismarck," unpublished mss.
- Schofield, VICE ADM. B.B., Loss of the Bismarck, United States Naval Institute, Annapolis, Maryland, 1972.
- Leach, Admiral of the Fleet Sir Henry, Letters to Mr. William H. Garzke, Jr., 1980-1981, 1990-1991.
- Garzke, Wiliiam H., letters to Paul Rudek, 1990 and telephone interview conducted by Stephan Reuter.
- Garzke, William H., Dulin, Robert O., Brown, David K., Harris, Stewart and Yaeger, Dana: "Deep Underwater Exploration Vehicles, Their Past, Present and Future," Centennial Transactions of the Society of Naval Architects and Marine Engineers, 1993.
Notes marked "Ed." are those of Warship International Assistant Editor William J. Jurens, who edited the original print version of this article.
- ^GM/Beam ratios of from 0.05 to 0.10 are generally considered to be indicative of good warship design practice. Too low a GM results in a ship with less than desirable stability. Excessive GM causes a ship to be unduly "stiff," with a relatively short rolling period.
- ^It is instructive to note that all navies exceeded these "Treaty" constraints. The Royal Navy came closest to full compliance and their ships of the King George V class were consequently amongst the weakest of all the Treaty Battleships. Forced to comply with a near-impossible combination of design constraints on beam, draft and sheer, as well as 14-inch gun armament, the designers came up with ships which were well-armored, but suffered from inefficient propulsive machinery and a deficient torpedo defense system. The latter was marginally improved in Anson, Howe, King George V, Duke of York and Vanguard later in the war, incorporating lessons learned from the loss of Prince of Wales in the South China Sea (Refs. 6, 7, 8 and 9).
- ^This information was gleaned by the authors from Paul Rudek whose station was in Bismarck's main battery fire control.
- ^The possible causes of the explosion of the 15-inch gun magazine vary. Either shell splinters passed through the bounding bulkhead from the adjacent 4-inch gun magazine or the heat of the 4-inch gun magazine caused the ignition of the cordite in the main battery magazines. A deflagration is a fire which burns violently with intense heat, giving off sparks, a near explosion.
- ^Captain Colin McMullen, at the time the Gunnery Officer on Prince of Wales, noted to us that he could not remember any noise associated with the destruction of Hood. He noted that he was wearing headphones and that there was a slight wind blowing by his position, but that he was certain he would have heard the noise of a loud explosion so near to his own ship. In many respects, the incident was comparable to the tragedy in Turret II of USS Iowa on 19 April, 1989.
- ^Winston Churchill was furious at this incident, exclaiming that "British battleships do not turn away from the enemy." This was an unfair indictment, for Prince of Wales was a brand-new ship with a partially-trained crew and unreliable main battery turrets.
- ^This evidence was provided by seaman Josef Statz, whose battle position was in Damage Control Central.
- ^Although very few of the slide images obtained by Dr. Ballard's team showed vertical surfaces, and almost none of these showed the hull, by chance one view showed evidence of this torpedo hit. The top edge of the main armor belt is shown, and the joint between two plates shows a displacement of a couple of inches, indicating the inboard displacement of one armor plate caused by the effects of the detonation of the torpedo warhead against it.
- ^Force "H" was normally based at Gibraltar for Mediterranean operations. Winston Churchill had ordered the destruction of Bismarck to be a matter of the highest priority and these urgently-needed ships were diverted to join in the hunt for the Bismarck. Winston Churchill's order to his fleet read as follows: "Bismarck must be sunk at all costs and if to do this it is necessary for the King George V to remain at the scene (running short of fuel) she must do so, even if it means subsequently towing her home." Churchill's order to Admiral Tovey, received after the Bismarck had been sunk, infuriated the Admiral, who flung his cap against a bulkhead and retired to his quarters.
- ^Ironically, recent evidence indicates that the relatively high striking velocities caused by the short range of the final engagement might have induced British heavy shells to shatter, thus actually decreasing their ability to penetrate. Ed.
- ^German usage was to identify turrets from forward to aft alphabetically: Anton, Bruno, Caesar and Dora.
- ^To assist in identification, the editors have adopted U.S. Naval practice in which gun installations are defined by both caliber and position. Mount 61, for example, being the most forward 6-inch turret on the starboard side. Whether Bismarck's 150mm secondary battery installations are more properly defined as "mounts" or "turrets" is difficult to resolve and we have chosen to call them turrets here. The turret (or mount) numbers referred to in the text are keyed on Figure 2.
- ^Based on the testimony of survivors, the authors are confident these anchor chains were severed as a result of gunfire damage during the action of 27 May and not released as a damage control measure to improve the trim by the bow. Naval Constructor Schlüter had recommended on 25 May that the anchors and chains be dropped to reduce the trim by the bow, but this was not done at that time. After the fateful torpedo hit on the evening of the 26th and the succeeding destroyer attacks throughout that night, the exhausted and resigned commanders of Bismarck did nothing to improve the doomed ship's trim by the bow.
- ^Mr. Statz, whose memory has been repeatedly shown to be remarkably accurate based on the photographic evidence of the wreck of the Bismarck, is insistent that he escaped by jumping into the water on the port side from between the two guns of the amidships 15cm turret (Turret 64, in our usage), which was trained out on the beam at the time.
- ^All four 380mm turrets fell away from the wreck of the Bismarck as she capsized and sank. Only one of these turrets was detected in the debris field, lying upside down and buried in the silt.
- ^Marine archeological searches are normally helped by the debris field, which can extend for more than a mile from the main wreckage site. As lighter debris typically will be carried further away from the ship by undersea currents, searchers can often locate a lost wreck by homing in on the heavier debris.
- ^The USS North Carolina design was based on a five bulkhead configuration, while the later South Dakota and Iowa configurations featured four bulkheads with a sloping armored belt imbedded within the system. The British King George V/Prince of Wales system was based on a three bulkhead arrangement.
- ^This Bookmark does not exist in the original printed version of this article and it is unknown what it referred to.
The following notes are by T. DiGiulian, editor and transcriber for the electronic version of this article.
- ^Bismarck fired three salvos to find the range - the third one straddling - and then fired three more salvos at Hood. The fifth salvo struck and exploded the Hood, the sixth salvo was fired just before the fifth salvo struck.
- ^2.12.2Whether or not radar was used by the Prince of Wales during this engagement is an unresolved subject. It is not supported by Capt. S.W. Roskill, R.N., in his semi-official history "War at Sea" which says, "In the Prince of Wales no results were obtained from either of her two [radar] sets [types 281 and 284] throughout the action." This is apparently taken from "Gunnery Appendix to Narrative of Operations Against Bismarck," page 193 of ADM234/509. From the account given by the Prince of Wales' Radar Officer, Sub-Lieutenant Stuart E. Paddon, RCNVR, this failure appears to have been an organizational rather than a technical problem. In his article, "HMS Prince of Wales - radar officer", published in Salty Dips, Vol. 1 (NOAC, Ottawa, 1983) he states:
"My position was in the 281 receiving office and I personally manned the display tube. In those days we had no gyro repeats; we had to give the bearings by red or green [port or starboard], but we did have two M-type transmission units, little counter-drums on which we could transmit range. The transmission counter-drum that I controlled had as its counterpart a receiver on the bulkhead of the Transmitting Station - the TS. This had to be read and placed by someone into the calculations which were being carried out on the plot. Unfortunately, despite the fact that I transmitted these ranges, no one even knew they were coming in on the counter-drum and no radar ranges were used by our gunnery people. We had only one previous shoot and had not developed any drill."
It is possible that radar ranges were used for gunnery during Prince of Wales' second engagement with Bismarck and that the two incidents were confused in the memories of the participants.
- ^Although these incidents do show that the cartidges would ignite under severe conditions, it is interesting to note that no propellant fires occurred in any of the gun-actions fought by German ships during World War II.
- ^The authors of this article have apparently modified their opinion about the source of this damage since their corroboration on Dr. Ballard's 1988 book, "The Discovery of the Bismarck." In that book, this particular hole was ascribed to "shell hits." When their own book, "Battleships - Axis and Neutral Battleships in World War II," was revised and republished in 1990 with the new information from Dr. Ballard's exploration, they then subscribed to a theory that this damage was from a secondary explosion of the 105mm ready ammunition. In my personal opinion, this theory seems unlikely, as the hole damage was mainly on the Oberdeck (USN Main deck level) while the 105mm mounts with their ready ammunition were a deck higher on the Aufbaudeck (USN 01 level). The torpedo theory that the authors now embrace can be further supported by a time analysis of the Dorsetshire's track and torpedo run times. At 1025 the Dorsetshire fired two torpedoes into the Bismarck's starboard side from two miles away. The Dorsetshire then circled around to the Bismarck's port side, noting at 1035 that the Bismarck had taken up a large list to port. The Dorsetshire then fired one more torpedo at 1036 from just over a mile away. The torpedoes used, the Mark VII, had a speed of 35 knots. So, it would have taken this last torpedo just about two minutes to travel the distance to Bismarck, or 1038. This torpedo was seen to strike amidships, which is the location of the large hole. Given that the Bismarck was listing to port, it seems likely that this torpedo was indeed the cause of this damage. The Bismarck then rolled completely over at 1039 and sank at 1040.
- ^Specifically, the Compass Platform.
The article was originally published in Warship International No. 2, 1994, and was transcribed for the internet by Tony DiGiulian.
The article is copyrighted 1999 - 2023 by International Naval Research Organization and NavWeaps.com.